Make Your Own Garage Garden Workbench: A DIY guide to organisation and efficiency
Transforming your garage into a functional and organised workspace requires thoughtful planning and strategic design. One key element that can greatly enhance both the efficiency and enjoyment of your garage is a garden workbench. A garage garden workbench serves as a dedicated area for potting plants, maintaining tools and tackling various gardening tasks. In this article, we’ll look at the process of creating a bespoke garden workbench to suit your space and gardening needs. From choosing the right materials to optimising storage solutions, we’ll explore how to build a practical yet stylish workbench that will enhance your gardening experience while maximising the use of your garage space. Whether you’re an experienced green thumb or just starting out, a well-designed garden workbench will become an indispensable part of your garage sanctuary.
Understanding Your Needs
Before embarking on the construction of your garage garden workbench, it’s crucial to thoroughly assess the available space in your garage. This initial step will help you determine the size, layout, and placement of your workbench, ensuring optimal functionality and convenience. The following is a guide on how to go about assessing your garage space:
Measurements
Start by measuring the dimensions of your garage, including length, width and height. Note any obstructions such as doors, windows or support beams that may affect the placement of your workbench.
Traffic flow
Consider the traffic flow in your garage. Make sure there is enough space around the workbench for movement and access to other areas of the garage, such as vehicle parking or storage.
Accessibility
Determine the most convenient location for your workbench. Ideally, it should be close to the garage entrance or a door leading to the outdoor garden area. This placement will allow easy access to tools, plants and supplies while minimising the need to navigate through the garage.
Use wall space
Evaluate the vertical space in your garage and consider using the walls for storage and organisation. Installing pegboards, shelves or cabinets above or around the workbench can help maximise storage without taking up valuable floor space.
Safety considerations
Ensure that the area where you plan to install the workbench is free of hazards such as electrical outlets, water sources or flammable materials. Also leave plenty of space around potentially dangerous equipment or machinery to prevent accidents.
Future expansion
Anticipate your future gardening needs and consider whether additional space or features may be required. Leave room for possible expansion or modifications to accommodate evolving hobbies or projects.
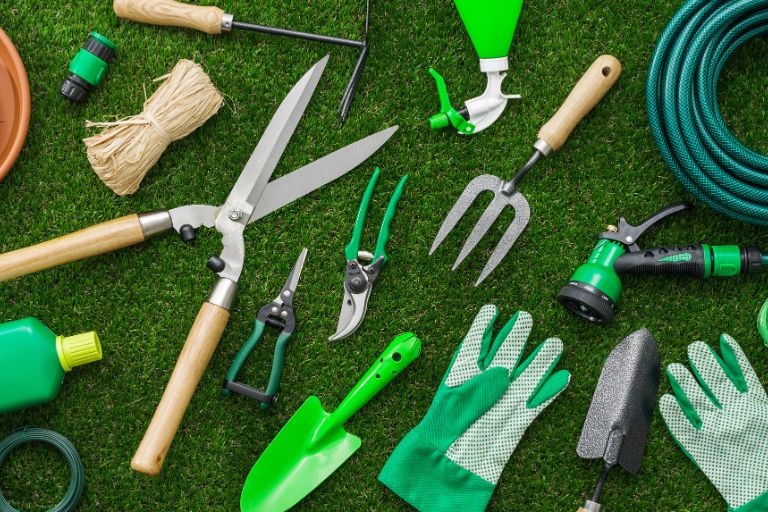
Understanding the tools and equipment that are essential to your gardening activities is essential to designing a practical and efficient garden workbench. By identifying your most commonly used items, you can ensure that your workbench is equipped to handle your gardening tasks effectively. The following is a guide on how to identify the tools and equipment you use most often:
Inventory
Start by taking an inventory of your gardening tools and equipment. This can include hand tools such as trowels, pruners and shears, as well as larger equipment such as shovels, rakes and wheelbarrows.
Frequency of use
Evaluate how often you use each tool or piece of equipment. Consider categorising them based on frequency of use, with key tools that you use regularly placed within easy reach on the workbench.
Seasonal considerations
Consider the seasonality of your gardening activities. Certain tools may be used more frequently during certain seasons, such as planting in the spring or pruning in the autumn. Make sure your workbench is equipped to handle these seasonal changes.
Specialist tools
Identify any specialised tools or equipment that are unique to your gardening tasks. This could include soil testing kits, seedling trays or compost bins. Allocate space for these items on your workbench or in a nearby storage area so they are easily accessible.
Tool organisation
Determine the most efficient way to organise your tools on the workbench. Consider using tool racks, hooks or magnetic strips to keep frequently used tools within reach while maximising space efficiency.
Future needs
Anticipate future gardening projects or activities that may require additional tools or equipment. Leave room for expansion or adjustments to accommodate new tools as your gardening interests evolve.
Understanding your gardening tasks and workflow is essential to designing a garage workbench that optimises efficiency and convenience. By considering the sequence of tasks you perform and the tools you use for each task, you can create a workbench layout that facilitates a smooth and organised workflow. The following is how to consider your gardening tasks and workflow when designing your workbench:
Sequence of tasks
Analyse the sequence of tasks involved in your gardening activities, from seedling propagation to plant maintenance and harvesting. Identify the logical order in which these tasks are performed to streamline your workflow.
Work zones
Divide your workbench into different zones based on the types of tasks you perform. For example, designate one area for potting and transplanting, another for tool maintenance and sharpening, and a separate area for seed starting or propagation.
Tool accessibility
Arrange your tools and equipment for easy access and to minimise the need to search for items. Keep frequently used tools within easy reach, while seldom-used items can be stored in nearby bins or shelves.
Work area organisation
Designate specific areas of the workbench for different tasks to maintain order and efficiency. Use containers, trays or dividers to keep soil, seeds and planting supplies organised and contained during potting activities.
Ergonomic considerations
Consider ergonomics when designing your workbench layout to minimise strain and fatigue during extended gardening sessions. Ensure that work surfaces are at a comfortable height and that tools are easily accessible without excessive bending or reaching.
Seasonal adaptability
Consider how your gardening tasks and workflow may change with the seasons. Design your workbench to accommodate seasonal changes, such as providing extra space for seed starting trays in the spring or incorporating storage for harvested produce in the autumn.
Flexibility and adaptability
Keep your workbench design flexible to accommodate changes in your gardening practices or the addition of new tasks and tools over time. Choose modular storage solutions or adjustable shelving to easily reconfigure the layout as needed.
Designing Your Workbench
Choosing the right materials for your garage workbench is essential to ensure durability, functionality and aesthetics. Choosing between materials such as wood and metal depends on a number of factors, including your specific needs, budget and personal preferences. The following is how to choose the right materials based on durability and aesthetic preferences:
Wood
Durability – Choose quality hardwoods such as oak, maple or cedar for maximum durability and longevity. These woods resist moisture, rot and warping, making them ideal for garage environments where exposure to moisture and temperature fluctuations is common.
Functionality – Wood is relatively easy to work with and can be tailored to your specific dimensions and design preferences. It provides a sturdy and stable surface for various gardening tasks, including potting, transplanting and tool maintenance.
Aesthetic appeal – Wood offers a natural and warm aesthetic that complements both traditional and contemporary garage environments. You can choose from a variety of finishes, stains and sealants to enhance the look of your workbench and match your garage décor.
Metal
Durability – Metal workbenches, typically constructed from steel or aluminium, are highly durable and resistant to rust, corrosion and impact damage. They are well suited to heavy-duty use and can withstand the rigours of the workshop environment.
Functionality – Metal workbenches often have integrated storage shelves, drawers and pegboards, providing ample space for organising tools and equipment. They provide a stable and sturdy work surface for tasks such as tool maintenance, assembly and repair.
Aesthetic appeal – Metal workbenches have a sleek and industrial look that appeals to minimalist and contemporary design preferences. They are available in a variety of finishes, including powder coated or stainless steel, which can enhance the visual appeal of your workshop workspace.
Hybrid materials
Consider hybrid materials that combine the benefits of wood and metal, such as a wood top with metal legs or vice versa. This option allows you to enjoy the durability of metal construction while incorporating the warmth and aesthetic appeal of wood accents. Hybrid materials offer versatility in design and can be customised to achieve a balance between durability, functionality and aesthetic preferences.
Ultimately, the choice of materials for your garage garden workbench will depend on your specific requirements and priorities. Whether you prefer the natural beauty of wood or the industrial strength of metal, choosing quality materials will ensure that your workbench will stand up to the demands of your gardening activities while enhancing the overall appearance of your garage workspace.
Choosing the right size and dimensions for your garage workbench is essential to optimise space utilisation, functionality and comfort. By considering your available space, storage needs and intended use, you can determine the ideal dimensions to suit your needs. This is how to determine the size and dimensions of your workbench:
Measure your space
Start by measuring the available space in your garage where you want to install the workbench. Take accurate measurements of the length, width and height, taking into account any obstructions such as doors, windows or utility connections.
Assess functional requirements
Consider the main activities you’ll be doing on the workbench, such as potting plants, tool maintenance or storage. Determine the amount of surface area and storage space needed to accommodate your tools, equipment and supplies.
Workbench depth
The depth of the workbench should be sufficient to provide a comfortable work surface for your gardening tasks. A depth of 24 to 30 inches is usually sufficient for most activities, and provides ample space for potting plants and arranging tools.
Workbench length
The length of the workbench will depend on the space available in your garage and the extent of your gardening activities. Think about the longest tools or equipment you’ll be using and make sure the workbench has enough room for them.
Height considerations
Determine the appropriate height for the workbench based on your ergonomic comfort and working posture. A standard workbench height is approximately 34 to 36 inches, but you can adjust this based on your height and preferences.
Storage space
Allocate space for storage shelves, drawers or pegboards based on your organisational needs. Consider the types of tools and supplies you’ll be storing and make sure there’s enough room for easy access and retrieval.
Clearance around the workbench
Allow adequate clearance around the workbench for movement and access to other areas of the garage. Make sure there’s enough room to open doors, manoeuvre tools and move around the workbench comfortably.
Future expansion
Anticipate future changes or additions to your gardening activities and allow room for expansion or modifications to the workbench. Choose a design that can accommodate additional shelves, accessories or attachments as needed.
Taking accurate measurements, assessing functional requirements and allowing for future flexibility will ensure that your workbench fits seamlessly into your workshop environment, providing maximum utility and comfort.
To create a highly efficient garage workbench, it is essential to incorporate various storage and organisational features. These features not only maximise space utilisation, but also improve accessibility and productivity. This is how to incorporate storage shelves, drawers, pegboards and hooks for maximum efficiency:
Storage shelves
– Install sturdy, adjustable shelves above and below the workbench to store tools, pots, bags of soil and other gardening supplies.
– Use open shelving for frequently used items to ensure easy access and visibility of contents.
– Consider installing cabinets with doors to hide less frequently used items and maintain a tidy work area.
Drawers
– Incorporate drawers into your workbench design to organise small tools, gardening gloves and seeds.
– Use dividers or organisers within drawers to separate and categorise items, making them easier to find.
– Choose heavy-duty drawer slides to support the weight of tools and equipment and ensure smooth operation.
Pegboards
– Mount a pegboard on the wall behind the workbench to provide vertical storage for hand tools, pruning shears and other hanging items.
– Use hooks, pegs and baskets to hang tools of different sizes, keeping them within easy reach and off the worktop.
– Arrange tools on the pegboard in a logical order based on frequency of use and task requirements for easy retrieval.
Hooks and hangers
– Install hooks and hangers on the sides or underneath the workbench to hang larger tools such as shovels, rakes and hoses.
– Use magnetic strips or hooks to store metal tools and accessories to keep them organised and easily accessible.
– Consider incorporating tool racks or rails for vertical storage of long-handled tools to maximise floor space and minimise clutter.
Integrated features
– Explore workbench designs that incorporate built-in features such as tool racks, cup holders and electrical outlets for added convenience.
– Incorporate integrated lighting fixtures or task lighting above the workbench to illuminate your work area and improve visibility for detailed tasks.
Modular systems
– Consider modular storage systems that can be easily reconfigured or expanded to meet changing needs over time.
– Invest in stackable bins, containers or trolleys that can be moved around the workshop as required for flexibility and convenience.
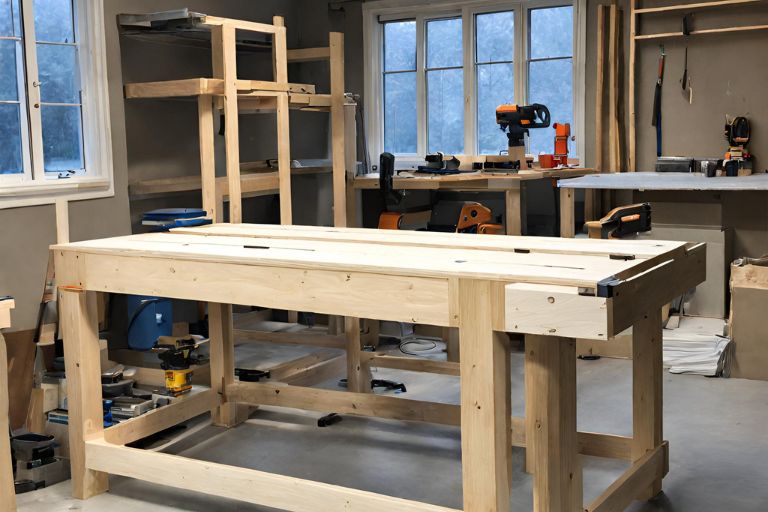
Construction Process
Building the frame is the basic step in building your garage garden workbench. Follow these step-by-step instructions to build a strong and durable frame for your workbench:
Materials needed
– 4×4 or 2×4 wood for legs and frame
– Wood screws or bolts
– Electric drill
– Hacksaw
– Tape measure
– Spirit level
– Carpenter’s square
Step 1 – Measure and cut the timbers
Measure and mark the desired height for your workbench legs on the 4×4 or 2×4 lumber. A typical workbench height is about 34 to 36 inches, but adjust to your preference.
Use a saw to cut four pieces of wood to the desired length for the legs, making sure they are all the same height.
Step 2 – Assemble the legs
Lay two of the cut pieces of wood parallel to each other on a flat surface, making sure they are evenly spaced.
Place another piece of cut lumber perpendicular to the parallel pieces to form an L-shaped corner.
Use wood screws or bolts to secure the pieces together, drilling through the perpendicular piece into the ends of the parallel pieces.
Repeat this process to make a total of four leg assemblies.
Step 3 – Construct the frame
Position two of the leg assemblies parallel to each other with the shorter ends facing inwards.
Measure and cut two pieces of wood to the desired length for the width of your workbench.
Place one cut piece of wood between the leg assemblies at the top and another at the bottom to form a rectangular frame.
Use wood screws or bolts to attach the frame pieces to the legs, making sure they are securely fastened.
Use a level and a carpenter’s square to ensure that the frame is square and level.
Step 4 – Add support braces (optional)
Measure and cut additional pieces of wood to act as support braces between the legs and frame.
Position the support braces diagonally between the legs and frame for added stability.
Secure the support braces to the legs and frame with wood screws or bolts.
Step 5 – Repeat for additional frames (optional)
If you are building a larger workbench or incorporating multiple workbenches, repeat the above steps to build additional frames.
Ensure that each frame is square and level before proceeding to the next step.
Step 6 – Join the frames together (optional)
If you are building a longer workbench or joining several frames together, position the frames parallel to each other with their tops aligned.
Measure and cut additional pieces of wood to act as cross braces between the frames.
Fasten the cross braces to the tops of the frames using wood screws or bolts, making sure they are evenly spaced and aligned.
Step 7 – Check for stability and levelness
Once the frame(s) are assembled, test the stability and levelness of the workbench by applying pressure and using a spirit level.
Make any necessary adjustments to ensure the workbench is stable and level before proceeding with the next steps.
You have successfully built the frame for your Garden Workbench. With the frame in place, you can now proceed to add the workbench top and any additional features such as shelves, drawers or pegboards to customise your workbench to suit your needs and preferences.
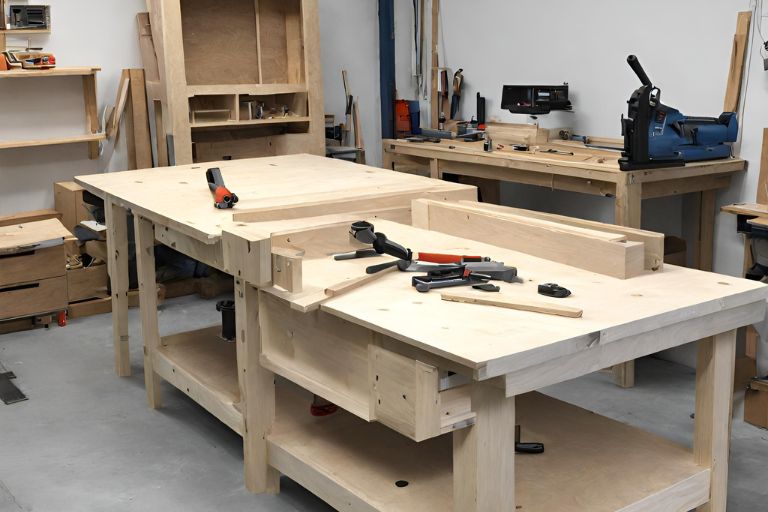
Once you’ve built the components of your shed workbench, it’s important to assemble them properly and securely. The following are techniques for effectively assembling and securing components:
1. Pre-drilling holes
Before screwing or bolting components together, pre-drill pilot holes to prevent splitting or cracking of the wood.
Use a drill bit slightly smaller in diameter than the screws or bolts you are using to ensure a tight fit.
2. Use wood screws
Choose good quality wood screws that are suitable for the thickness of the wood you are working with.
Drive the screws straight into the pre-drilled pilot holes, making sure they are flush with the surface of the wood.
Use a power drill with a screwdriver bit for efficiency, but be careful not to over-tighten the screws as this can strip the threads or damage the wood.
3. Screw components together
For added strength and stability, use bolts and nuts to secure heavy components such as legs or support braces.
Carefully align the components before inserting the bolts through pre-drilled holes to ensure they are square and level.
Use washers under the bolt heads and nuts to distribute pressure evenly and prevent damage to the wood.
4. Gluing joints (optional)
Apply wood glue to the mating surfaces of joints before screwing or bolting components together for added strength and stability.
Use clamps to hold the components firmly in place while the glue dries, ensuring a tight bond between the parts.
5. Reinforce joints
For added strength, consider adding metal brackets or corner braces at joints where two components meet.
Fasten the brackets with screws or bolts, making sure they are properly aligned and securely fastened to both pieces of wood.
6. Check for squareness and levelness
Use a carpenter’s square to ensure that corners are square and joints are properly aligned before securing components.
Use a spirit level to check that the workbench frame is level both horizontally and vertically, adjusting if necessary before final assembly.
7. Final inspection
When all components are assembled and secured, perform a final inspection to ensure that everything is properly aligned, tightened and stable.
Test the stability of the workbench by applying pressure at various points and checking for any wobbling or movement.
Reinforcing the structure of your garage workbench is essential to ensure its durability and stability, especially for heavy use. Some tips on how to strengthen the structure include:
Use thick and strong wood
Choose thicker, stronger wood for the frame, legs and supports of your workbench. This will provide a solid foundation that can support heavy loads without sagging or buckling.
Double up on components
Double up on key structural components such as legs and supports to increase strength and stability. For example, instead of using a single 2×4 for each leg, sandwich two pieces together for extra reinforcement.
Add cross bracing
Install diagonal cross braces between the legs and frame of the workbench to prevent lateral movement and twisting. This will distribute the weight more evenly and reduce the risk of the workbench collapsing under heavy loads.
Use metal brackets or gussets
Reinforce joints and connections with metal brackets or gussets to increase structural integrity. These can be screwed or bolted to corners and intersections for added support.
Anchor to wall or floor
Secure the workbench to the wall or floor to prevent tipping or shifting during use. Use anchor bolts or screws to secure the workbench legs or frame to studs in the wall or concrete floor.
Install additional supports
Install additional supports or braces along the length of the workbench, especially for longer spans. This will help distribute the weight evenly and prevent the worktop from bowing or buckling.
Reinforce joints with dowels or dovetails
Use dowels or dovetail joints to reinforce connections between components, especially for load-bearing joints. These methods provide a strong and durable joint that can withstand heavy use over time.
Consider metal reinforcement
Incorporate metal reinforcements, such as angle irons or steel tubing, into the workbench frame construction for added strength and rigidity. These materials are particularly useful for heavy-duty applications.
Use structural screws or lag bolts
Use structural screws or lag bolts to secure components together as they provide superior strength and holding power compared to standard wood screws. Be sure to pre-drill pilot holes to avoid splitting the wood.
Regular maintenance and inspection
Perform regular maintenance and inspection of the workbench to detect any signs of wear or damage. Replace worn or damaged components immediately to prevent structural failure.
Customisation and Personalisation
Personalising your workbench with paint, stains or decorative elements not only enhances its aesthetic appeal, but also adds a unique touch that reflects your personality and style. Some tips on how to add a personal touch to your workbench include:
Choose a colour scheme
Choose a colour scheme that complements your garage décor and reflects your personal preferences. Consider using bold colours for a pop of personality or subtle tones for a more subdued look.
Prepare the surface
Prepare the surface of the workbench by sanding it smooth and removing any dust or debris. This will ensure better adhesion and a smoother finish for the paint or stain.
Apply the paint or stain
Use a high-quality paint or stain designed for outdoor or heavy-duty applications to ensure durability and longevity.
Apply several coats of paint or stain, allowing each coat to dry completely before applying the next. Use a brush, roller or spray to ensure even coverage.
Experiment with different painting techniques such as stencilling, sponge painting or distressing to create unique textures and patterns.
Add decorative elements
Incorporate decorative elements such as decals, stencils or hand-painted designs to further personalise the workbench.
Use waterproof decals or stencils to add floral motifs, gardening quotes or your favourite plants and flowers to the workbench surface.
Consider adding custom hardware such as decorative knobs or drawer pulls to enhance the overall look of the workbench.
Protective finish
When the paint or stain is completely dry, apply a clear protective finish such as polyurethane or varnish to seal and protect the surface.
Choose a finish that is suitable for outdoor use and offers UV protection to prevent fading and discolouration over time.
Accessorise with plants or decor
Add a personal touch to your workbench by accessorising with potted plants, decorative pots or garden-themed decorative items.
Use hanging baskets, planters or shelves to display your favourite plants and flowers and add a touch of greenery and freshness to your workspace.
Customise storage solutions
Personalise storage solutions such as shelves, drawers and pegboards with labels, tags or decorative hardware.
Use chalkboard paint or adhesive labels to create custom labels for organising tools, supplies and equipment.
Reflect your style
Let your creativity shine by incorporating elements that reflect your unique style and interests. Whether it’s rustic, modern, vintage or eclectic, add your personality to the design of the workbench.
Adding extra features like built-in potting trays or tool racks to your garage garden workbench can significantly enhance its functionality and convenience. Some ideas for incorporating these additional features include:
Built-in potting trays
Designate a portion of the bench surface as a built-in potting tray by creating a shallow depression or recess.
Line the tray with a waterproof liner or tray insert to prevent water damage to the workbench surface.
Use the potting tray for transplanting, starting seeds and other messy gardening tasks, keeping soil contained and easy to clean up.
Tool Racks
Install tool racks along the sides or back of the workbench to keep frequently used tools organised and within easy reach.
Use pegboards, hooks or magnetic strips to hang hand tools such as trowels, pruners and shears.
Build in shelves or compartments for larger tools such as shovels, rakes and hoes to keep them neat and accessible.
Storage drawers or cabinets
Add built-in storage drawers or cabinets under the workbench to store gardening gloves, seeds, fertiliser and other small items.
Use drawer dividers or organisers to keep items organised and easily accessible, maximising storage efficiency.
Install cabinet doors or drawer fronts to conceal stored items and maintain a clean and organised appearance.
Integrated irrigation system
Incorporate an integrated watering system into the workbench design, such as a built-in hose reel or faucet connection.
Install a small sink or bowl for watering plants, washing hands or cleaning garden tools so that water is easily accessible without leaving the workbench.
Folding worktops
Design the workbench with fold-down or collapsible work surfaces that can be extended as needed for additional work space.
Use hinges or brackets to attach the fold-down surfaces to the workbench frame so they can be easily folded up and secured when not in use.
Adjustable shelves or hooks
Install adjustable shelves or hooks on the back or sides of the workbench to accommodate different types and sizes of tools and equipment.
Use adjustable brackets or pegboard systems to customise the layout and configuration of storage space to suit your needs.
Lighting and sockets
Incorporate built-in lights or task lights above the workbench to illuminate the work area and improve visibility for detailed tasks.
Install power outlets or USB ports near the workbench for charging electronic devices, powering tools or plugging in lights.
Making ergonomic adjustments to your garage workbench is essential to ensure comfort, safety and efficiency when carrying out various gardening tasks. Here are some important ergonomic considerations and adjustments you can make:
Workbench height
Adjust the workbench height to suit your height and working posture. The ideal workbench height is usually between 34 and 36 inches, but may vary based on individual preference.
Consider factors such as your height, arm length and the type of work you’ll be doing to determine the ideal workbench height.
Worktop depth
Ensure that the depth of the worktop provides enough space for comfortable movement without causing strain or overreaching.
Aim for a worktop depth of around 24 to 30 inches to allow plenty of room for potting plants, arranging tools and other gardening tasks.
Foot clearance
Allow adequate foot clearance under the workbench for comfortable sitting or standing.
Adjust the height of the base frame or legs to ensure that your feet and legs can move freely without obstruction.
Tool accessibility
Arrange tools and equipment on the workbench to minimise the need to bend, reach or twist.
Keep frequently used tools within easy reach and arrange them ergonomically to reduce strain on your body.
Anti-fatigue mat
Place an anti-fatigue mat or cushioning material on the floor under the workbench to reduce pressure on your feet and lower back when standing for long periods.
Choose a mat of sufficient thickness and resilience to provide adequate support and comfort while working.
Task lighting
Install task lights or adjustable lights above the workbench to illuminate the work area and reduce eye strain during detailed tasks.
Position fixtures to minimise glare and shadows for optimum visibility without discomfort.
Seating options
Provide a comfortable seating option, such as a stool or chair with adjustable height and back support for tasks that require prolonged sitting.
Choose a seating option that promotes good posture and allows for easy movement and adjustment while working at the bench.
Adjustable components
Include adjustable components, such as height-adjustable shelves, adjustable-tilt worktops or swivel tool holders, to accommodate different users and task requirements.
Ensure that adjustable components are easy to operate and lock securely to prevent accidental movement during use.
Keep the work area clear
Keep the work surface clear of clutter and unnecessary items to maintain a clean and organised workspace.
Store tools, supplies and equipment in designated storage areas or shelves to minimise distractions and optimise efficiency.
Organisation and Storage Solutions
Strategically arranging tools and supplies on your garage workbench is essential for maximising efficiency and ease of access when gardening. The following is how to strategically organise and arrange tools and supplies for easy access:
Group similar items together
Organise tools and equipment into groups based on their function or use. For example, group hand tools such as trowels, pruners and shears together and separate them from larger tools such as shovels and rakes.
Group gardening supplies such as potting soil, fertiliser and seeds in designated containers or bins.
Prioritise frequently used items
Place frequently used tools and supplies within easy reach on the workbench surface or in nearby storage compartments.
Arrange tools and supplies based on frequency of use, with frequently used items placed closest to your primary work area.
Use vertical space
Install pegboards, hooks or shelves above the workbench to maximise vertical storage and keep tools organised and accessible.
Hang hand tools, gardening gloves and other small items on hooks or pegs for quick and easy access.
Use tool organisers
Use tool organisers such as magnetic strips, tool racks or drawer dividers to keep tools organised and prevent clutter on the workbench surface.
Consider using tool organisers with labelled compartments or sections to quickly identify and locate specific tools when needed.
Provide dedicated storage areas
Designate specific storage areas or compartments for different categories of tools and supplies to maintain organisation and prevent mixing.
Use containers, bins or drawers with clear labels or markings to identify the contents of each storage area.
Keep work surfaces clear
Maintain a clear and uncluttered work surface by storing tools and supplies when not in use.
Use storage solutions such as shelves, cabinets or drawers to store tools and supplies when they are not needed for immediate use.
Optimise workflow
Arrange tools and supplies to facilitate your natural workflow and movement patterns.
Position tools and supplies according to the sequence of tasks you typically perform, ensuring everything is easily accessible and within reach.
Evaluate and adjust regularly
Periodically evaluate the organisation of tools and supplies on your workbench and make adjustments as needed to optimise efficiency and accessibility.
Remove unused or unnecessary items to free up space and prevent clutter from building up over time.
Using storage bins, jars and labelling systems is a great way to keep things organised on your garage workbench. The following is how to effectively incorporate these storage solutions into your work area:
Storage bins
Choose storage bins or containers in a variety of sizes to accommodate different types of tools, supplies and equipment.
Use clear plastic bins to easily identify contents without opening them, or opt for coloured bins to categorise items by type or function.
Label each bin with its contents using self-adhesive labels or markers for quick and easy identification.
Place bins on shelves or in cabinets under the workbench to keep them organised and accessible.
Glasses and containers
Repurpose empty jars or containers to store small items such as screws, nails, seeds or plant markers.
Use jars with screw-on or flip-top lids to prevent spills and keep contents secure.
Arrange jars on a shelf or in a drawer organiser for easy access, and label each jar with its contents using sticky labels or markers.
Labelling systems
Use a labelling system to identify the contents of storage bins, jars, drawers and shelves.
Use adhesive labels, label makers or printable labels to create clear and legible labels for each storage container or compartment.
Include descriptive labels that identify the contents of each container, making it easier to find items quickly and efficiently.
Organise labelled containers by category or function, such as ‘hand tools’, ‘seeds’, ‘fertiliser’ or ‘potting materials’, to streamline organisation and retrieval.
Drawer organisers
Use drawer organisers with compartments or dividers to keep small items such as gloves, hand tools or seed packets neatly sorted and separated.
Arrange items in drawer organisers according to size, shape or frequency of use for easy access.
Label each compartment or drawer with its contents using adhesive labels or markers for quick identification.
Wall-mounted storage systems
Install wall-mounted storage systems such as pegboards, grid panels or slatwall panels above the workbench to maximise vertical storage space.
Hang hooks, baskets or shelves from the wall mounted panels to keep tools, supplies and equipment within easy reach.
Label each storage accessory or section with its contents using self-adhesive labels or markers for clarity and organisation.
Rotating carousel organisers
Consider using rotating carousel organisers or turntable trays to store frequently used items such as spray bottles, hand tools or gardening supplies.
Place the carousel organiser on the workbench or in a nearby storage area for easy access, and label each compartment with its contents for quick identification.
Implementing space-saving ideas such as fold-down worktops or overhead storage can help maximise the efficiency and functionality of your garage workbench. Some effective ways to incorporate these space-saving solutions include:
Folding worktops
Install fold-down worktops on the sides or front of the workbench to create additional workspace when needed.
Use hinges or brackets to attach the fold-down surfaces to the workbench frame, allowing them to be easily folded up and secured when not in use.
Folding worktops are ideal for tasks that require extra space, such as potting plants or organising supplies, and can be folded away to save space when not in use.
Overhead storage
Use overhead storage above the workbench to keep tools, supplies and equipment organised and out of the way.
Install shelves, cabinets or racks on the wall or ceiling to store items such as bins, containers or rarely used tools.
Use adjustable shelving or modular storage units to customise overhead storage to suit your needs and preferences.
Pegboards and hooks
Install pegboards or grid panels on the wall above the workbench to create vertical storage for tools and accessories.
Use hooks, brackets and baskets to hang tools, gardening gloves and other items on the pegboard to keep them organised and easily accessible.
Pegboards are versatile and can be customised to suit your space and storage needs, making them an excellent space-saving solution for small garages.
Wall mounted shelving
Install wall shelving above the workbench to store items such as containers, jars or small tools.
Use floating or adjustable shelves to maximise vertical storage space and keep items organised and within easy reach.
Wall-mounted shelving is ideal for storing lightweight items that are used frequently and need to be easily accessible while working at the workbench.
Cabinet and drawer organisers
Use cabinets and drawers under the workbench to store larger tools, supplies and equipment.
Install drawer organisers or dividers to keep items such as hand tools, gloves and small parts neatly sorted and separated.
Use labelled bins or containers to store items in cabinets and drawers, making them easy to find and retrieve when needed.
Rolling storage trolleys
Use rolling storage or utility carts to store tools, supplies and equipment that are frequently used but need to be mobile.
Place the carts under the workbench when not in use to save space and roll them out when needed for easy access to items.
Maintenance and Upkeep
Cleaning and maintaining your workbench is essential to ensure its longevity, functionality and safety. The following is some tips on how to clean and maintain your garage and garden workbench:
Regular cleaning routine
Establish a regular cleaning schedule to keep your workbench clean and free of dirt, debris and spills.
Sweep or vacuum the workbench surface regularly to remove dust, dirt and plant debris.
Wipe the workbench surface with a damp cloth or sponge to remove any stains, spills or sticky residue.
Use gentle cleaning agents
Use mild soap and water or a diluted solution of household cleaner to clean the workbench surface.
Avoid using harsh chemicals, abrasive cleaners or solvents that may damage the finish or surface of the workbench.
Protective Coatings
Apply a protective coating or sealant to the workbench surface to protect it from moisture, stains and scratches.
Use a clear polyurethane or varnish to seal the wood surface, or choose a durable paint or epoxy coating for metal workbenches.
Re-apply the protective coating as needed to maintain its effectiveness and extend the life of the workbench.
Remove rust and corrosion
If your workbench has metal components that are prone to rust and corrosion, inspect and clean these areas regularly to prevent damage.
Use a wire brush or sandpaper to remove surface rust and apply a rust inhibitor or rust converter to protect the metal from further corrosion.
Lubricate moving parts such as hinges, drawer slides and locking mechanisms with a light machine oil or silicone lubricant to prevent rust and ensure smooth operation.
Organise tools and supplies
Keep tools and supplies organised and properly stored to prevent clutter and minimise the accumulation of dirt and debris on the workbench surface.
Use storage bins, drawers, shelves and pegboards to keep tools and supplies neatly sorted and easily accessible.
Return tools and supplies to their designated storage areas after each use to maintain a clean and organised work area.
Inspect for damage
Inspect the workbench regularly for signs of damage, wear or deterioration, such as loose joints, cracked wood or warped surfaces.
Repair or replace damaged components immediately to prevent further damage and ensure the safety and stability of the workbench.
Protective measures
Use protective mats, pads or trays on the workbench surface to protect it from spills, stains and scratches.
Place a heavy-duty rubber or vinyl mat under heavy or sharp objects to prevent damage to the workbench surface.
Cover the workbench with a suitable cover or tarp when not in use to protect it from dust, moisture and sunlight.
Keep the work area clear
Keep the area around the workbench clean and free of clutter to prevent accidents and ensure safe and efficient working conditions.
Store tools, equipment and other items in designated storage areas or cabinets to minimise tripping hazards and maintain a clear work area.
Maintaining the longevity of the materials used in your garage workbench is essential to ensure its durability and functionality over time. Some strategies for maintaining the longevity of materials include:
Choose quality materials
Choose durable, high-quality materials such as pressure-treated lumber, hardwoods or corrosion-resistant metals to build your workbench.
Invest in materials that can withstand outdoor conditions, moisture and heavy use to ensure long-term durability and stability.
Apply protective coatings
Apply a protective coating or sealant to the wood components of the workbench to protect them from moisture, UV exposure and wear.
Use a clear polyurethane, varnish or exterior grade paint to seal the wood surface and prevent warping, rotting or decay.
Choose finishes that offer UV protection to prevent the workbench from fading and discolouring over time.
Use stainless steel hardware
Use stainless steel or galvanised hardware such as screws, bolts and nails to assemble the workbench frame and components.
Stainless steel hardware is resistant to rust, corrosion and weathering, ensuring long-term durability and structural integrity of the workbench.
Regular maintenance
Establish a regular maintenance routine to inspect, clean and maintain the workbench components.
Look for signs of wear, damage or deterioration, such as loose joints, cracked wood or rusted hardware, and address them immediately to prevent further damage.
Clean the workbench regularly to remove dirt, debris and stains, and apply protective coatings or sealants as needed to maintain the integrity of the materials.
Protective measures
Use protective measures such as covers, mats or tarps to protect the workbench from harsh weather, moisture and sunlight when not in use.
Store the workbench indoors or in a covered area during inclement weather or when not in use for extended periods to prevent damage and deterioration of the materials.
Avoid overloading
Avoid overloading the workbench with excessive weight or pressure that could stress or damage the materials.
Distribute weight evenly over the surface of the workbench and avoid placing heavy or sharp objects directly on the wood or metal components to prevent bending, warping or scratching.
Proper use and maintenance
Use the workbench for its intended purpose and avoid subjecting it to excessive stress, impact or misuse.
Follow the manufacturer’s instructions and recommendations for assembly, use and maintenance of the workbench to ensure optimum performance and longevity of materials.
Repair and replacement
Monitor the condition of the workbench regularly and repair or replace damaged or worn components as necessary.
Replace worn or deteriorated materials with high quality replacements to maintain the structural integrity and functionality of the workbench.
Periodic adjustments and upgrades are essential to keep your garage workbench in optimum condition and to adapt it to your changing needs. Some suggestions for periodic adjustments or upgrades as needed include:
Evaluate functionality
Periodically evaluate the functionality of your Workbench and identify areas that may need improvement or modification.
Consider how well the workbench suits your current gardening tasks and workflow and identify areas for improvement.
Adjust the height of the workbench
If you find that the height of the workbench is causing discomfort or strain during use, consider adjusting it to better suit your ergonomic needs.
Raise or lower the height of the workbench as needed to ensure a comfortable working position and minimise fatigue or injury.
Reorganise storage solutions
Periodically re-evaluate the organisation and layout of storage solutions such as shelves, drawers and pegboards.
Adjust storage configurations based on changes in tool inventory, gardening supplies or work patterns to optimise efficiency and accessibility.
Upgrade tool storage
Upgrade tool storage solutions to accommodate new tools or equipment and improve organisation.
Consider adding additional shelves, hooks or drawer dividers to better organise and store tools, supplies and accessories.
Improve lighting and electrical outlets
Upgrade lighting fixtures or add additional task lighting to improve visibility and reduce eye strain during detailed tasks.
Install additional electrical outlets or USB ports near the workbench for charging electronic devices or powering tools, providing convenient access to electricity when needed.
Replace worn components
Monitor the condition of workbench components, such as hardware, hinges and drawer slides, and replace worn or damaged parts as needed.
Upgrade to higher quality materials or hardware to improve the durability and longevity of the workbench.
Incorporate new features
Incorporate new features or accessories into the workbench design to increase functionality and versatility.
Consider adding built-in potting trays, tool racks or integrated storage solutions to accommodate specific gardening tasks or equipment.
Expand the work area
Expand the workbench’s work area by adding fold-down worktops, extension panels or modular attachments.
Create additional space for potting, planting or organising by extending the workbench surface as needed.
Improve mobility
Improve the mobility of the workbench by adding castors or wheels to the legs for easier relocation and flexibility in workspace arrangement.
Install locking castors to secure the workbench in place during use and prevent unwanted movement.
Personalise the aesthetics
Personalise the aesthetics of the workbench by adding trim, paint or stain to reflect your style and preferences.
Update the look of the workbench to enhance its visual appeal and integrate seamlessly with your garage or garden décor.
By periodically evaluating and adjusting your garage workbench, you can ensure that it continues to meet your needs and provide a functional and efficient workspace for your gardening activities. Stay proactive and make adjustments or upgrades as needed to maintain the longevity and effectiveness of your workbench over time.
Creating a garage garden workbench is a rewarding endeavour that enhances both the functionality and aesthetics of your garden space. By carefully considering factors such as available space, workflow, materials and features, you can design a workbench that meets your specific needs and preferences.
Assessing the space available in your shed will help you determine the size and dimensions of the workbench that will fit comfortably and efficiently. Identifying the tools and equipment you use most frequently will help you plan storage solutions and organisation. Considering your gardening tasks and workflow will ensure that the workbench is designed to support your activities seamlessly.
Choosing the right materials based on durability and aesthetic preferences will ensure your workbench is built to last and complements your garage or garden décor. Incorporating features such as storage shelves, drawers, pegboards and hooks maximises efficiency and organisation, keeping tools and supplies within easy reach.
Building the workbench frame and assembling the components requires careful attention to detail and proper techniques to ensure stability and structural integrity. Reinforcing the structure for heavy duty use extends the life of the workbench and prevents damage over time.
Adding personal touches such as paint, stains or decorative elements adds character and style to your workbench, making it a reflection of your personality and passion for gardening. Implementing space-saving ideas such as fold-down worktops or overhead storage maximises the use of limited space and increases functionality.
Regular cleaning and maintenance is essential to ensure the longevity of the materials used and to keep the workbench in optimum condition. Periodic adjustments or upgrades allow you to adapt the workbench to your changing needs and ensure it remains a valuable asset in your gardening endeavours.