Harnessing Nature’s Palette: Crafting Natural Dyes from Garage Garden Plants
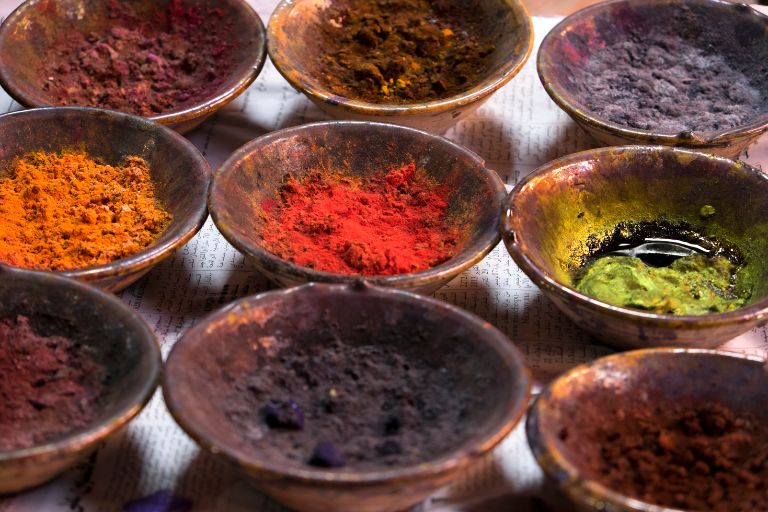
The journey from garden to dye pot opens up a realm of possibilities where common plants become potent pigments, waiting to infuse textiles with nature’s hues. From the golden petals of marigolds to the earthy tones of onion skins and the rich purples extracted from humble avocado stones, garage garden plants offer a diverse palette for the adventurous artisan.
In this article, we take a journey into the heart of natural dyeing, exploring the alchemy that occurs when plant pigments meet fibre. We delve into the process of selecting, harvesting and preparing plant materials, unlocking the secrets of mordants and modifiers that enhance colour fastness and deepen hues. Through step-by-step instructions and creative applications, we invite you to join us in harnessing nature’s bounty to create unique textiles that capture the essence of your garage garden oasis.
Beyond the joy of creative expression, the choice to use natural dyes has profound environmental significance. By choosing sustainable alternatives to synthetic dyes, we not only reduce our carbon footprint, but also connect more closely with the rhythms of the natural world.
Introduction to Natural Dyeing
Throughout human history, natural dyes have played a central role in textile production, dating back thousands of years to ancient civilisations. The earliest evidence of natural dyeing dates back to around 2600 BC in the Indus Valley civilisation, where madder, turmeric and other plant dyes were used to colour textiles.
In ancient Egypt, the use of indigo from the woad plant (Isatis tinctoria) created the iconic blues seen in the famous burial shrouds and robes of the pharaohs. Similarly, the ancient Greeks and Romans used various plant and mineral sources to dye fabrics, with Tyrian purple, extracted from the glands of certain molluscs, becoming synonymous with royalty and luxury.
During the Middle Ages and Renaissance in Europe, natural dyeing reached new heights of sophistication and artistry, with guilds dedicated to the cultivation and trade of dyes. Woad and madder were widely cultivated, while exotic dyes such as cochineal (derived from insects) and kermes (from the bodies of a type of scale insect) were imported from distant lands.
However, the widespread introduction of synthetic dyes in the 19th century marked a significant change in the textile industry. Chemical dyes offered greater colour consistency, faster dyeing times and a wider range of colours, leading to the decline of natural dyeing practices. While this transition was revolutionary in terms of efficiency and convenience, it also raised environmental and health concerns due to the toxic chemicals involved in the production and disposal of synthetic dyes.
In recent decades, natural dyeing has experienced a remarkable resurgence, fuelled by growing environmental awareness and a desire for sustainable alternatives. Artisans, designers and eco-conscious consumers alike have rediscovered the beauty and intrinsic value of natural dyes. By harnessing the colours of the earth – from plant leaves and roots to flowers and bark – natural dyers are reconnecting with ancient traditions while embracing innovation and creativity.
Moreover, the resurgence of interest in natural dyes aligns with broader movements towards sustainable fashion and conscious consumerism. As concerns about the environmental and social impact of the fashion industry continue to grow, natural dyes offer a renewable and biodegradable alternative to synthetic counterparts, reducing pollution and supporting local communities.
Advantages of Using Natural Dyes
Environmentally friendly – Natural dyes are derived from renewable plant, mineral and insect sources, making them inherently more sustainable than their synthetic counterparts. Unlike synthetic dyes, which often rely on petrochemicals and heavy metals, natural dyes have minimal environmental impact as they biodegrade and do not contribute to soil and water pollution.
Non-toxic – Natural dyes are typically free of the harmful chemicals found in synthetic dyes, such as aromatic amines and heavy metals like chromium and lead. This makes them safer for the environment and human health. Artisans and consumers alike can rest assured that textiles dyed with natural dyes are free from potentially harmful substances.
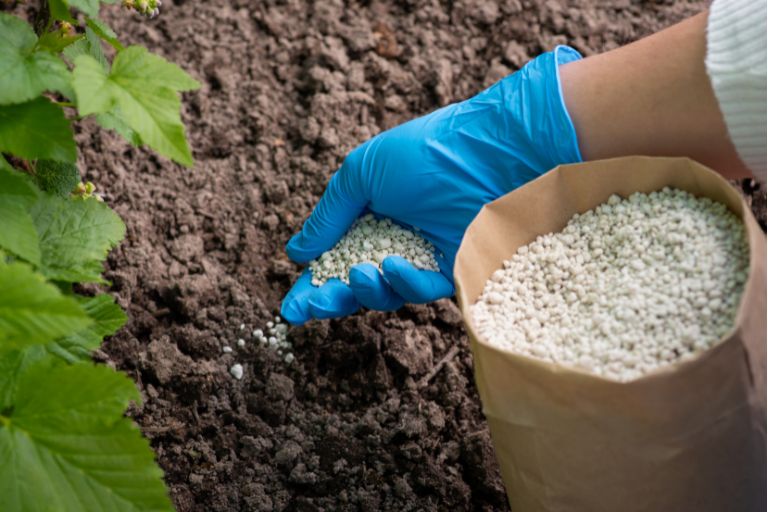
Sustainable – The cultivation and extraction of natural dyes supports sustainable agricultural practices and often involves traditional, low-impact methods. Many natural dye plants can be grown organically and require minimal water and energy inputs. In addition, natural dyes promote biodiversity by preserving traditional knowledge and protecting native plant species.
Aesthetic appeal – Natural dyes offer a diverse and nuanced colour palette, from earthy tones to vibrant hues, that cannot always be replicated with synthetic dyes. Each plant, mineral or insect source yields its own unique colour variations, creating unique textiles with rich depth and character. This aesthetic appeal adds value to handmade and artisanal products, appealing to consumers seeking authenticity and individuality.
Cultural heritage – Natural dyeing has a rich cultural heritage that spans centuries and includes diverse traditions from around the world. By using natural dyes, artisans honour and preserve these cultural legacies and connect with ancestral knowledge passed down through generations. This cultural significance adds an extra layer of meaning and appreciation to textiles dyed with natural dyes.
Plants for Natural Dyeing
Selection Criteria for Plants in Natural Dyeing
Availability
– Choose plants that are readily available in your region or can be easily grown in your garden or local environment. Accessibility of plants ensures sustainability and reduces the carbon footprint associated with sourcing exotic or imported dyes.
– Consider seasonal availability, as certain plants may be more abundant at certain times of the year. Harvesting plants at their peak ensures optimal colour yield and quality.
Colour intensity
– Select plants with vibrant pigments capable of producing the desired range of colours. Some plants will produce intense colours, while others may produce more subtle hues. Experimentation and research can help identify plants known for their colour fastness and intensity.
– Keep in mind that factors such as the part of the plant used (leaves, flowers, roots, bark) and dyeing techniques (extraction method, staining) can influence colour intensity. For example, marigold flowers produce bright yellows, while avocado seeds produce rich purples and reds.
Mordant compatibility
– Consider the mordant compatibility of the plant materials, as certain dyes may require the use of mordants to fix the colour to the fabric and improve colour fastness.
– Choose plants that are compatible with commonly used mordants such as alum, iron, copper and tin. Researching the specific mordant requirements of different plant dyes will help ensure successful dyeing results.
– Some plants naturally contain tannins or other substances that act as mordants, reducing the need for additional mordants. Understanding the natural mordanting properties of plants can simplify the dyeing process and reduce reliance on external additives.
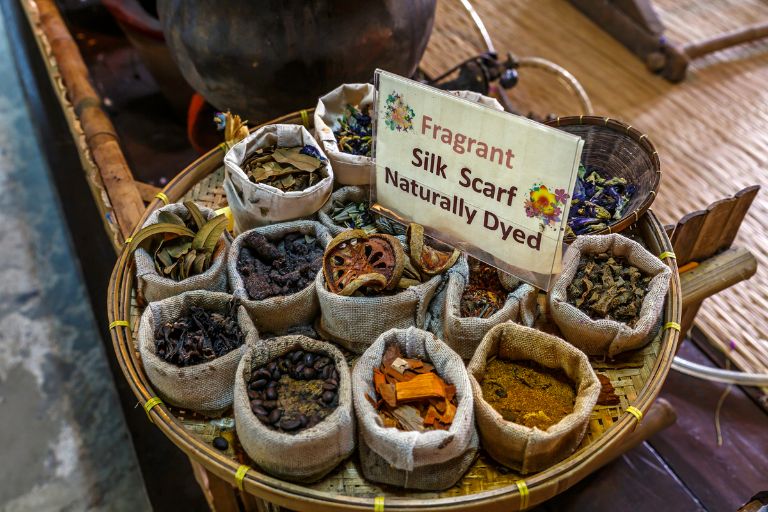
Examples of Garage Garden Plants Suitable for Dyeing
Marigold (Tagetes spp.)
– Marigolds are popular garden flowers known for their bright flowers and vibrant colours, especially yellow and orange.
– Both the petals and leaves of marigolds can be used to produce yellow and gold hues.
– Marigold dye is easy to extract using simple boiling or solar dyeing methods and requires minimal processing.
Onion skins (Allium cepa)
– Onion skins, a by-product of cooking or food preparation, can be collected and reused for natural dyeing.
– The papery outer skins of onions produce a range of warm colours, including golden yellows, rich oranges and deep browns.
– Onion skin dye is extracted by boiling the skins in water, releasing the natural pigments that can be absorbed by textile fibres.
Avocado Seeds (Persea americana)
– Often discarded as waste, avocado seeds contain tannins and natural pigments that produce beautiful shades of pink, peach and mauve.
– After enjoying the flesh of an avocado, save the pits and allow them to dry thoroughly before using them for dyeing.
– Avocado pit dye can be extracted by a long boiling process or cold water extraction methods, resulting in soft pastel shades ideal for natural dyeing projects.
Black walnut shells (Juglans nigra)
– Commonly found in backyard gardens, black walnut trees produce nuts encased in thick, green shells that turn brown-black as they mature.
– The shells contain natural pigments that produce rich, dark browns and earthy greys when used as a dye.
– Extracting dye from black walnut hulls involves boiling the hulls to release the pigments, which can then be used to dye natural fibres such as wool and cotton.
Purple coneflower (Echinacea purpurea)
– Purple coneflowers, prized for their medicinal properties and striking flowers, also offer potential as a natural source of dyes.
– The petals of purple coneflowers can be used as a dye to produce delicate shades of pink and mauve.
– To extract dye from purple coneflowers, the petals can be boiled in water or fermented to release the natural pigments before dyeing textiles.
Hollyhock (Alcea spp.)
– Hollyhocks are tall flowering plants that add a splash of colour to the border with their large, showy flowers.
– The petals of hollyhock flowers can produce a range of hues, including pale pinks, deep reds and purples.
– To extract dye from hollyhock petals, boil them in water to release the natural pigments, then strain the liquid before dyeing textiles.
Weld (Reseda luteola)
– Weld is a herbaceous plant with clusters of small, yellow flowers that has been used as a source of dye for centuries.
– Weld leaves contain a strong yellow dye known for its light-fastness and vibrant colour.
– To extract the dye from weldseed leaves, they are boiled in water with a mordant such as alum, then strained before dyeing textiles.
Coreopsis (Coreopsis spp.)
– Coreopsis, also known as tickseed, is a hardy perennial with bright yellow or orange flowers that bloom profusely throughout the summer.
– The petals of coreopsis flowers can be used to make bright yellow, gold and orange dyes.
– To extract dye from coreopsis petals, boil them in water with a mordant, then strain the liquid before dyeing textiles.
Eucalyptus (Eucalyptus spp.)
– Eucalyptus trees are known for their aromatic leaves and distinctive bark, which can be used to make natural dyes.
– The leaves, bark and even flowers of eucalyptus trees contain tannins and pigments that produce a range of colours including pale pinks, purples and greys.
– To extract dye from eucalyptus, the plant materials are boiled in water with a mordant, then strained before dyeing textiles.
Preparing Plant Materials
Harvesting Guidelines for Natural Dye Plants
Optimal timing
– Harvest plant material for dyeing at the peak of its potency, which often corresponds to specific growth stages or seasonal cycles.
– For annuals such as marigolds and coreopsis, harvest the flowers when they are fully open and vibrantly coloured, usually at the peak of the flowering season.
– Perennials such as hollyhock and echinacea can be harvested throughout the growing season, but aim to collect plant material before it begins to wilt or fade.
Plant parts to use
Flowers – For many dye plants, flowers contain the highest concentration of pigment and are therefore the primary plant part used for dyeing. Harvest flowers when they are fully open and at their most colourful.
Leaves – In some cases, such as weld and eucalyptus, the leaves contain the desired pigments for dyeing. Harvest leaves from healthy plants and avoid those that are damaged or diseased.
Bark and stems – Certain trees, such as black walnut and eucalyptus, have bark or stems that can be used to extract dyes. Harvest bark or stems from pruning or fallen branches to ensure sustainability and minimal impact on the tree.
Roots – Some plants, such as madder and goldenrod, contain pigments in their roots. Harvest roots from mature plants, taking care to leave enough for the plant to regrow.
Harvesting practices
– Use sharp, clean scissors or pruning shears to harvest the plant material, making clean cuts to avoid damaging the plants.
– Harvest only what you need for immediate use to ensure the freshness and potency of the plant materials.
– Consider the sustainability of your harvesting practices and avoid over-harvesting wild populations or garden plants that may need time to recover.
– Handle harvested plant material carefully to avoid bruising or crushing, which can affect the quality of colour pigments.
Techniques for Extracting Dye Pigments
Boiling method
– The boiling method is one of the most common techniques for extracting colour pigments from plant materials.
– To use this method, the harvested plant materials (such as flowers, leaves or bark) are placed in a pot of water and brought to a gentle boil.
– Simmer the plant material for a long time, usually one to several hours, to allow the pigments to release into the water.
– After boiling, the liquid is strained to remove the plant materials, leaving the dye solution ready for use.
Fermentation method
– Fermentation of plant materials is another technique used to extract dye pigments, particularly for materials that may not release their pigments readily by boiling alone.
– To use this method, the harvested plant material is placed in a container with water and allowed to ferment over a period of days or weeks.
– As the plant material ferments, natural enzymes break down the cell walls, releasing the pigments into the water.
– When the fermentation is complete, the liquid is strained to remove the plant materials, leaving a dye solution that can be more concentrated and vibrant than boiling alone.
Solar dyeing process
– Solar dyeing uses the power of the sun to slowly and gently extract colour pigments from plant materials over time.
– To use this method, place the harvested plant material in a container of water, making sure it is completely submerged.
– Place the container in a sunny spot, such as a windowsill or outdoors, and leave it for an extended period of time, usually days to weeks.
– The heat and sunlight will gradually extract the pigments from the plant material, resulting in a subtle but beautifully coloured dye solution.
– Once the dye bath has reached the desired intensity, the liquid is strained to remove the plant materials, leaving a dye solution ready for use.
Mordants and Modifiers
Explanation of Mordants and Their Role in Fixing Dyes to Fibres
Mordants are substances used in the dyeing process to help fix or bind the dye pigments to the fibres of the textile, improving colour fastness and durability. They act as a bridge between the dye molecules and the fibres, strengthening the bond and ensuring that the colour remains vibrant and resistant to fading over time.
The role of mordants can be understood in several key ways.
Bonding to the fibre
When fibres are immersed in a dye bath, dye molecules are attracted to the surface of the fibres but cannot form strong bonds on their own.
Mordants form chemical bonds with both the dye molecules and the fibres, creating a stable bond that helps anchor the dye to the textile.
Change fibre structure
Mordants can change the structure of the fibres, making them more receptive to dye molecules and improving dye uptake and retention.
Depending on the type of fibre and the mordant used, this change may involve opening up the pores of the fibre or creating reactive sites for dye attachment.
Colour enhancement
Mordants can affect the final colour of the dyed fabric by interacting with the dye molecules and changing their hue, intensity or shade.
Different mordants can produce subtle variations in colour, allowing dyers to achieve a wide range of shades and effects.
Improving wash and light fastness
By binding the dye molecules more securely to the fibres, mordants help to improve the wash and light fastness of the dyed fabric.
This means that the colour remains vibrant and resistant to fading even after repeated washing and exposure to sunlight.
Common mordants used in natural dyeing include alum (potassium aluminium sulphate), iron, copper, tin and chromium. Each mordant has its own properties and effects on colour, and their choice depends on factors such as the type of dye, the fibre, the desired colour result and environmental considerations.
Common Household Mordants:
Alum (potassium aluminium sulphate)
– Alum is one of the most widely used mordants in natural dyeing and is readily available in many household and craft stores.
– It is a versatile mordant that works well with a wide range of natural dyes and fibres, including wool, silk and cotton.
– Alum produces bright, clear colours and is particularly effective at fixing natural dyes in plant fibres such as cotton and linen.
– When used as a mordant, alum is usually dissolved in hot water and added to the dye bath before the fibres are dipped.
Iron (ferrous sulphate)
– Iron is another common household mordant, easily obtained from iron nails, steel wool or iron supplements.
– It is used to alter and darken colours, often producing deeper, more muted shades with a characteristic ‘saddening’ effect.
– Iron mordant is particularly effective in achieving greys, blacks and earth tones and can be used with a variety of natural dyes and fibres.
– To prepare an iron mordant, iron objects are usually soaked in water to create a rusty solution, which is then added to the dye bath or applied directly to the fibres.
Vinegar (acetic acid)
– Vinegar is a common household acid that can act as a mordant when combined with certain natural dyes, especially those that require an acidic environment for optimal dye uptake.
– It is used primarily with protein-based fibres such as wool and silk, helping to set acid dyes and improve colour fastness.
– Vinegar can also be used to shift or modify the pH of the dye bath, affecting the final colour of the dyed fabric.
– When vinegar is used as a mordant, it is usually added to the dye bath or used as a post-dye treatment during rinsing.
Modifiers for Altering Dye Shades
Vinegar
– Vinegar, a common household acidic substance, is used as a modifier to shift or intensify certain dye colours, particularly those that require an acidic pH for optimal colour uptake.
– When added to the dye bath or used as a post-dye treatment, vinegar can enhance the brightness and clarity of colours, especially those derived from plant dyes.
– Vinegar is particularly effective with natural dyes on protein-based fibres such as wool and silk, helping to fix the dye and improve colour fastness.
Baking soda (sodium bicarbonate)
– Baking soda is an alkaline substance commonly found in household kitchens and is used as a modifier to shift or soften dye colours.
– When added to the dye bath or used as a post-dye treatment, baking soda can alter the pH of the dye solution, resulting in colour shifts or variations.
– Baking soda is often used to create softer, more muted tones in dyed fabrics, especially with certain natural dyes that are sensitive to alkalinity.
Ferric water (ferrous sulphate solution)
– Iron water, a solution made by dissolving iron salts such as ferrous sulphate in water, is used as a modifier to darken or “sadden” dye colours.
– When applied to dyed fabrics or added to the dye bath, iron water reacts with the dye molecules to produce deeper, more muted shades, often shifting colours towards greys, blacks or earth tones.
– Iron water is particularly effective in modifying the colour of natural dyes on protein-based fibres such as wool and silk, but can also be used on cellulosic fibres such as cotton and linen.
Dyeing Process
Step-by-Step Instructions for Dyeing Natural Fibres
Materials required
Natural dyes (e.g. plant materials, dye extracts)
Mordant (e.g. alum, iron, vinegar)
Natural fibre fabric or yarn (e.g. cotton, wool, silk)
Large pots or containers for dyeing
Stirring utensils
Colander or sieve
Protective gloves and apron (optional)
pH modifier (e.g. vinegar, baking soda) (optional)
Iron water (ferrous sulphate solution) (optional)
Instructions
Prepare the fabric/yarn
– Wash the fabric or yarn thoroughly to remove any dirt, oils or finishes that may interfere with dye absorption.
– For protein-based fibres such as wool and silk, soak the fabric or yarn in warm water for about 30 minutes before dyeing to ensure even dye absorption.
Prepare the dye bath
– Depending on the material to be dyed, gather either fresh plant material, dried plant material or prepare dye extracts according to the instructions.
– Combine the dye material with water in a large saucepan and bring to a gentle boil. Allow the mixture to simmer for a long time to fully extract the colour pigments.
– If mordants are used, dissolve them in hot water and add to the dye bath to prepare the fibres for dyeing. The amount of mordant used depends on the type of fibre and the desired colour intensity (see specific mordant instructions).
Mordant the fabric/yarn (optional)
– Pre-mordant the fabric or yarn by soaking it in a mordant solution for an extended period of time, usually from a few hours to overnight. Ensure that the fabric or yarn is completely submerged in the mordant solution.
– Alternatively, the mordant can be added directly to the dye bath before the fabric or yarn is added.
Dyeing the fabric/yarn
– Once the dye bath has been prepared and any pre-dyeing steps have been completed, add the fabric or yarn to the dye bath.
– Gently stir the fabric or yarn to ensure even distribution of the dye and to prevent uneven dyeing.
– Allow the fabric or yarn to soak in the dye bath for an extended period of time, typically one to several hours, depending on the desired colour intensity.
– Monitor the dyeing process closely, checking the colour regularly and adjusting as necessary to achieve the desired shade.
Changing the colour (optional)
– If desired, modify the colour of the dyed fabric or yarn by adjusting the pH of the dye bath using vinegar (to increase acidity) or baking soda (to increase alkalinity).
– For darker or muted shades, consider adding iron water to the dye bath or applying it directly to the dyed fabric or yarn as a post-dye treatment.
Rinse and finish
– When the desired colour is achieved, remove the fabric or yarn from the bath and rinse thoroughly in cool water to remove excess dye and mordant residue.
– Hang the dyed fabric or yarn to dry in a well-ventilated area out of direct sunlight.
– When dry, the dyed fabric or yarn can be gently washed with a mild detergent to remove any remaining residues and to ensure colour fastness.
Tips for Achieving Desired Colour Intensity and Consistency in Natural Dyeing
Use high quality colour materials
Start with fresh, high quality colour materials, whether they are fresh plant materials, dried botanicals or commercially available colour extracts. The potency and freshness of the dye materials can significantly affect the intensity and consistency of the resulting colour.
Adjust the dye concentration
Experiment with varying the concentration of dyes in the dye bath to achieve the desired colour intensity. Increasing the amount of dye relative to the fibre content can result in deeper and more saturated colours.
Increase dyeing time
Allow sufficient time for the fabric or yarn to simmer in the dye bath to ensure optimum dye uptake. Longer dyeing times usually result in more intense colours, especially with natural dyes that require longer extraction times.
Consider mordanting
Mordants play a crucial role in natural dyeing by preparing the fibres to better absorb and retain the dye. Consider pre-mordanting the fabric or yarn or adding mordants directly to the dye bath to improve colour intensity and consistency.
Maintain a consistent temperature
Maintain a consistent temperature throughout the dyeing process to ensure even dye uptake and minimise colour variation. Avoid rapid temperature changes as they can affect the bonding of dye molecules to the fibres.
Stir and agitate
Stir the fabric or yarn gently and regularly during the dyeing process to ensure even distribution of the dye and to prevent uneven dyeing. Agitation of the dye bath helps to promote contact between the dye molecules and the fibres, improving dye penetration.
Checking colour progress
Periodically check the colour progression of the dyed fabric or yarn by taking a small sample and rinsing it in cool water. This will allow you to assess the colour intensity and make any necessary adjustments to the dye bath before the dyeing process is complete.
Experiment with modifiers
Explore the use of pH modifiers such as vinegar or baking soda to adjust the acidity or alkalinity of the dye bath, which can affect colour intensity and shade. Also consider using iron water as a post-dyeing modifier to darken or “sadden” colours.
Record and document
Keep detailed records of your dyeing experiments, including dye materials, concentrations, dyeing times and any modifiers used. This information can serve as a reference for future dyeing projects and help you reproduce or adjust colour results.
Safety Precautions for Handling Hot Liquids and Ensuring Proper Ventilation in Natural Dyeing
Protective clothing and equipment
– Wear heat-resistant gloves and an apron or protective clothing to protect your skin from contact with hot liquids and possible splashes.
– Use safety glasses or goggles to protect your eyes from splashes or vapours when working with boiling liquids.
Handling hot liquids
– Use caution when working with boiling water and hot dye baths to avoid burns and scalds. Use heat-resistant utensils and handles to minimise the risk of accidental contact.
– Avoid leaning over or directly inhaling steam from boiling dye baths to prevent burns to the respiratory tract.
Provide adequate ventilation
– Work in a well-ventilated area, such as a kitchen with open windows or doors, or outdoors if weather permits. Adequate ventilation will help disperse any fumes or vapours produced during the staining process.
– If working indoors, consider using a cooker hood or portable extractor fan to help remove fumes and maintain good air quality.
– Avoid working in confined spaces or areas with poor ventilation as this can lead to the accumulation of potentially harmful fumes and gases.
Avoid inhalation of dust and particles
– When handling dried dyes or powders, wear a dust mask or respirator to prevent inhalation of airborne particles.
– Work in an area with minimal air movement to avoid dispersal of dust and particles into the air.
– Exercise caution when mixing or transferring powdered dye materials to minimise the risk of creating dust clouds.
Safe handling and storage of chemicals
– Store corrosive agents and other chemical additives in labelled, tightly sealed containers away from heat, direct sunlight and moisture to prevent deterioration and accidental spillage.
– Keep corrosives and chemicals out of the reach of children and pets, and follow proper handling and disposal guidelines to minimise environmental impact.
First aid and emergency preparedness
– Keep a first aid kit in your work area with burn ointment, sterile bandages, and other basic supplies for treating minor injuries.
– Familiarise yourself with emergency procedures and know what to do in the event of a burn, spill or other accident.
Caring for Dyed Materials
Washing and Post-Dyeing Treatments to Enhance Colourfastness in Natural Dyeing
Rinse in cool water
After dyeing, rinse the dyed fabric or yarn thoroughly in cool water to remove excess dye and mordant residue. This will help prevent bleeding and fading of the dye colours in subsequent washes.
Use a mild detergent
Gently wash the dyed fabric or yarn with a mild detergent to remove any remaining residues and impurities. Choose a detergent that is free of harsh chemicals and fragrances to avoid compromising the colour fastness of the dye.
Avoid aggressive washing
Handle dyed fabrics with care during washing to minimise friction and agitation, which can cause colour loss and fading. Avoid harsh scrubbing or wringing and use gentle squeezing or pressing instead.
Perform colour fastness tests
Before washing the dyed fabric or yarn, perform colour fastness tests to assess the stability of the dye colours. Dampen a small area of the dyed fabric or yarn with water and press a white cloth against it. Check for any signs of bleeding or colour transfer onto the white cloth.
Use colour fixatives
Consider using colour fixers or after-treatments designed to improve colour fastness and lock in dye colours. These products can help stabilise the dye molecules and improve resistance to fading and bleeding, especially with natural dyes on cellulosic fibres such as cotton and linen.
Air dry out of direct sunlight
After washing, air dry the dyed fabric or yarn away from direct sunlight to prevent UV fading. Choose a well-ventilated area with good air circulation to ensure thorough drying and minimise the risk of mould or mildew growth.
Check for colour changes
Monitor the dyed fabric or yarn for any changes in colour or appearance during washing and drying. If you notice any fading, bleeding or other colour changes, adjust your washing and post-dye treatments accordingly.
Repeat washing and treatments as necessary
If necessary, repeat washing and post-dyeing treatments to further improve colour fastness and remove any residual colour. Take care not to over-wash, as excessive washing can also contribute to colour loss over time.
Eco-Friendly Detergents and Methods for Maintaining Dyed Fabrics
Choose eco-friendly detergents
Choose biodegradable, plant-based detergents that are free of harsh chemicals, synthetic fragrances and dyes. Look for certifications such as USDA Certified Biobased, EcoLogo or the EU Ecolabel to ensure they are environmentally friendly.
Eco-friendly detergents are gentle on fabrics and the environment, reducing the risk of chemical residue and water pollution.
Wash in cold water
Whenever possible, use cold water to wash coloured fabrics. Cold water is gentler on both fibres and dyes, helping to maintain colour intensity and minimise fading.
Cold water washing also saves energy compared to hot water washing, further reducing environmental impact.
Wash less often
Limit the frequency of washing dyed fabrics to extend their life and reduce water and energy consumption. Spot clean stains and odours as needed with eco-friendly stain removers or homemade cleaning solutions.
Air drying
Air drying dyed fabrics is the most environmentally friendly method of drying. Hang to dry on a clothesline or drying rack away from direct sunlight to prevent fading.
If possible, avoid using electric dryers as they use a lot of energy and can contribute to greenhouse gas emissions.
Avoid dry cleaning
Minimise the use of dry cleaning for dyed fabrics, as traditional dry cleaning methods often involve the use of harsh chemicals that can damage both fibres and dyes.
Instead, opt for hand or machine washing with eco-friendly detergents according to the fabric care label.
Store properly
Store dyed fabrics in a cool, dry place away from direct sunlight to prevent fading and degradation of dyes. Use acid-free tissue paper or fabric storage bags to protect fabrics from dust and moisture.
Repair and upcycle
Extend the life of dyed fabrics by repairing any rips, holes or loose seams. Consider upcycling old or worn fabrics into new projects to give them a second life and reduce waste.
Eco-friendly stain removal
For eco-friendly stain removal, try using natural ingredients such as white vinegar, baking soda or oxygen bleach. These gentle yet effective cleaners can help remove stains without compromising the integrity of dyes or fibres.
Creative Applications
Ideas for Incorporating Natural Dyes into DIY Projects
Clothing
Tie Dye – Use natural dyes to create vibrant tie-dye patterns on T-shirts, tank tops or dresses. Experiment with different folding and tying techniques to create unique designs.
Shibori – Explore the art of Japanese shibori dyeing to create intricate patterns on garments using different folding, twisting and binding techniques. Indigo is a popular natural dye for shibori.
Dip dyeing – Dipping fabric or garments into a natural dye bath to create gradient or ombre effects. Dip dyeing can be done with single or multiple colours for a modern and stylish look.
Block printing – Use natural dyes to create custom block-printed designs on clothing. Carve simple patterns or motifs into wooden blocks and use them to emboss fabric with colourful dyes.
Home Decor
Pillow Covers – Dye plain cotton or linen pillowcases with natural dyes to add a pop of colour to your home decor. Experiment with different dyeing techniques and patterns to suit your style.
Table linens – Create custom tablecloths, napkins or placemats with natural dyes to add a personal touch to your dining room. Consider using plant-based dyes for a rustic, earthy look.
Wall hangings – Dye fabric or yarn with natural dyes to create beautiful wall hangings or tapestries. Incorporate elements such as macramé, weaving or embroidery for added texture and visual interest.
Curtains – Dye lightweight fabrics such as muslin or cotton to create custom curtains or window treatments. Choose natural dyes in soothing or energising colours to enhance the ambience of your space.
Crafts
Eco-printed stationery – Create unique greeting cards, gift tags or art prints using eco-printing techniques. Place fresh or dried leaves, flowers or other botanicals on paper, fabric or watercolour paper and use natural dyes to transfer their pigments.
Eco-friendly Easter eggs – Use natural dyes from fruits, vegetables and spices to dye Easter eggs instead of commercial dyes. Experiment with ingredients such as turmeric, beetroot, red cabbage and onion skins to create a variety of colours.
Natural Dye Playdough – Make homemade playdough using natural dyes and ingredients like flour, salt, water and cream of tartar. Add natural colouring agents such as beet powder, spinach powder or turmeric to create vibrant colours that are safe for children to play with.
Hand dyed yarn – Use natural dyes to hand-dye yarn for knitting, crocheting or weaving projects. Experiment with different dyeing techniques and colour combinations to create unique skeins for your crafts.
Inspiration for Experimenting with Colour Combinations and Patterns in Natural Dyeing
Nature
– Be inspired by the colours and patterns found in nature, such as the changing hues of autumn leaves, the vibrant petals of flowers or the subtle gradients of a sunset sky.
– Take a nature walk and observe the interplay of colours in the landscape, from the earthy browns and greens of foliage to the vibrant blues and purples of wildflowers.
Art and design
– Explore the work of artists and designers known for their use of colour and pattern, from traditional textile artists to contemporary painters and illustrators.
– Look for inspiration in art movements such as Impressionism, Abstract Expressionism and Art Nouveau, which often feature bold colours, fluid forms and dynamic compositions.
Cultural and ethnic traditions
– Study the traditional textiles and dyeing techniques of different cultures and ethnicities around the world. Draw inspiration from the rich heritage of dyeing traditions, motifs and colour palettes.
– Explore the vibrant colours and intricate patterns of textiles from regions such as India, Japan, Africa and South America, each with its own unique aesthetic and symbolism.
Fashion and trends
– Keep an eye on the latest fashion trends and colour forecasts for inspiration. Experiment with trending colours and patterns to create modern and stylish designs that reflect your personal aesthetic.
– Look to fashion designers and brands known for their innovative use of colour and pattern, from high fashion runways to indie fashion labels and sustainable fashion initiatives.
Personal expression
– Allow your personal preferences, moods and emotions to guide your colour choices and pattern experimentation. Consider the feelings and associations that different colours and patterns evoke and use them to tell a story or convey a message through your dyeing projects.
– Embrace spontaneity and playfulness in your dyeing experiments, allowing yourself to explore unexpected colour combinations and abstract patterns that emerge through the creative process.
Collaborate and share
– Connect with other nature dyers and artists to share ideas, techniques and inspiration. Join online communities, attend workshops or classes, and participate in collaborative projects to expand your creative horizons and learn from others.
– Share your own dyeing experiments and creations with others, whether through social media, exhibitions or local craft markets. Inspire and be inspired by the vibrant community of makers and craftspeople around you.
The comparison between natural and synthetic dyes reveals significant differences in their environmental footprint, highlighting the importance of supporting sustainable dyeing practices for a greener future. While natural dyes offer a more environmentally friendly alternative with minimal impact on biodiversity, energy consumption and human health, synthetic dyes carry risks of pollution, toxicity and resource depletion.
In addition, supporting sustainable dyeing practices goes beyond environmental protection – it includes cultural heritage preservation, human rights advocacy and consumer empowerment. By choosing sustainably dyed products, consumers can have a positive impact on the textile industry, driving demand for ethical and transparent practices while encouraging innovation and collaboration across the supply chain.