
Garage Greenery: A Step-by-Step Guide to Growing Flavourful Microgreens at Home
What are microgreens and why they are a great choice for indoor growing?
Microgreens are young plants that are harvested just a few weeks after germination, when they are only a few centimetres tall. They are typically grown from a variety of vegetable, herb and grain seeds, including arugula, basil, broccoli, kale and wheatgrass. Microgreens are packed with nutrients, including vitamins, minerals and antioxidants, making them a popular addition to salads, sandwiches and other dishes.
Microgreens are a great choice for indoor growing for a number of reasons. Firstly, they take up very little space and can be grown on a windowsill, countertop or in a garage, making them a perfect choice for people who live in apartments or have limited access to outdoor space. Secondly, they are quick and easy to grow, with some varieties ready to harvest in as little as a week. This makes them an ideal choice for beginners who want to start an indoor garden but don’t have much gardening experience. Finally, microgreens are cost-effective to grow, requiring minimal investment in equipment and seeds, yet providing a high return in the form of nutritious, fresh produce.
Benefits of Growing Microgreens
Growing microgreens in the garage has become increasingly popular due to its many benefits. Some of the benefits of growing microgreens in your garage include:
Year-round availability – Indoor growing allows you to grow microgreens all year round, regardless of the season or weather conditions.
Easy to maintain – Microgreens are easy to grow and require minimal maintenance. They don’t take up much space and grow quickly, so you can enjoy fresh greens in a matter of weeks.
Nutritious – Microgreens are packed with nutrients including vitamins, minerals and antioxidants. They are also a good source of fibre and protein, making them a great addition to a healthy diet.
Sustainable – Growing microgreens at home is an environmentally friendly option as it reduces the carbon footprint associated with transporting and packaging store-bought microgreens.
Microgreens, Sprouts and Baby Greens
Microgreens, sprouts and baby greens are all types of young plants that are harvested before they reach maturity. However, they differ in their stage of growth, harvesting techniques, and flavour profiles. Here’s how microgreens differ from sprouts and baby greens:
Microgreens – Microgreens are tiny plants that are harvested when they are 1-2 inches tall and have their first true leaves. They are grown in soil or other growing media and require light and air circulation. Microgreens are usually harvested with scissors or a knife and sold as a single cut. They have a more intense flavour than baby greens and come in a variety of colours and textures.
Sprouts – Sprouts are seeds that are germinated in water and harvested after a few days when they begin to sprout. They are grown in water and require frequent rinsing to prevent mould growth. The sprouts are usually harvested with a sieve or sprouting jar and eaten whole, including the roots. They have a mild flavour and are often used in sandwiches, salads and stir-fries.
Baby greens – Baby greens are young plants that are harvested when they are slightly more mature than microgreens, usually when they have 2-4 true leaves. They are grown in soil or other growing media and require light and air circulation. Baby greens are usually harvested with scissors or a knife and can be sold as a single cut or as a live plant. They have a milder flavour than microgreens and come in a variety of colours and textures.
Microgreens are tiny plants that are harvested at a specific stage of growth and grown in soil, while sprouts are seeds that are germinated in water and harvested after a few days. Baby greens are young plants that are harvested when they are slightly more mature than microgreens and are also grown in soil. Each type of young plant has its own unique flavour profile and culinary uses.
Using Microgreens in Recipes
Microgreens are a versatile and nutritious ingredient that can add colour, flavour and texture to a variety of dishes. Some ideas for using microgreens in recipes include:
Salads – Microgreens are a great addition to salads and can add an extra layer of texture and flavour. Try adding microgreens such as rocket, radish or pea shoots to your salad for a fresh and crunchy taste.
Sandwiches and wraps – Add microgreens such as alfalfa, broccoli, or sunflower seeds to your sandwich or wrap for a nutritious crunch.
Smoothies – Add a handful of microgreens like spinach or kale to your smoothie for an extra boost of vitamins and minerals.
Soups and stews – Add a handful of microgreens like coriander or parsley to your soup or stew just before serving for a pop of colour and freshness.
Tacos – Add a handful of microgreens like red cabbage or coriander to your tacos for a delicious and nutritious crunch.
Pizza – Add a handful of microgreens like rocket or basil to your pizza for a fresh and tasty twist.
Omelettes and scrambled eggs – Add microgreens like chives or spinach to your eggs for a nutritious and flavourful breakfast.
Garnish – Use microgreens such as radish or mustard to garnish your dishes for an extra pop of colour and flavour.
These are just a few ideas for using microgreens in recipes. Get creative and experiment with different microgreens in your favourite dishes.
Ideal Growing Conditions
To grow healthy and vibrant microgreens, you need to give them the right growing conditions. The ideal conditions for growing microgreens are:
Temperature – The ideal temperature range for growing microgreens is between 60-75°F (15-24°C). Temperatures below 60°F (15°C) can slow growth, while temperatures above 75°F (24°C) can result in leggy and less flavourful microgreens.
Lighting – Microgreens need a lot of light to grow, so it’s important to provide them with adequate light. A grow light is recommended for indoor growing, especially if you don’t have access to natural sunlight. Place the grow light about 2-3 inches above the microgreens and leave it on for 12-16 hours a day.
Humidity – Microgreens prefer a humid growing environment, so it’s important to keep the humidity between 50-60%. You can use a spray bottle or humidifier to maintain humidity levels.
Ventilation – Good ventilation is important to prevent mould growth and ensure healthy plant growth. Open a window or use a fan to circulate fresh air and prevent stagnant air.
Growing medium – Microgreens can be grown in soil or other growing media such as coco, peat moss or vermiculite. Choose a growing medium that is free of pathogens, well-draining and nutrient-rich.
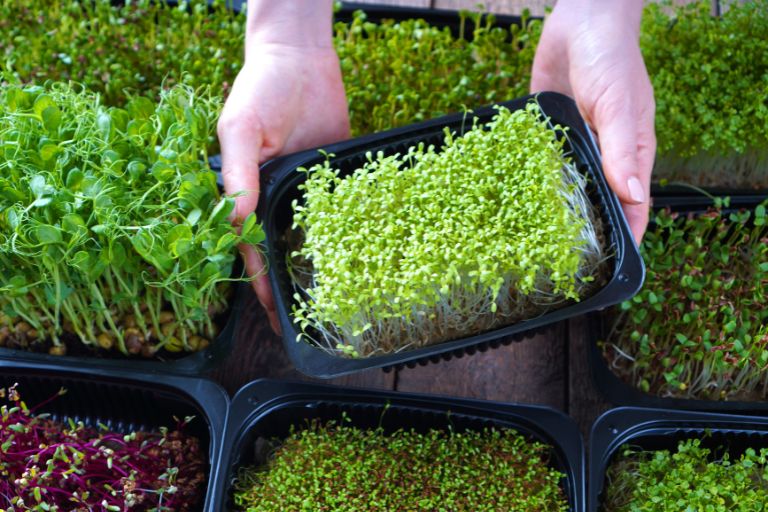
Choosing the Right Containers, Soil and Seeds
Choosing the right containers, soil and seeds is important for successful microgreen growing. Some tips to help you make the right choices include:
Containers – Microgreens can be grown in a variety of containers such as plastic trays, seedling flats or recycled containers. Choose a container that is at least 2-3 inches deep and has drainage holes to prevent waterlogging.
Soil – Microgreens can be grown in soil or other growing media such as coco coir or peat moss. Choose a growing medium that is free of pathogens, well-draining and nutrient-rich. Avoid using soil from your garden as it may contain weed seeds, pests or diseases.
Seeds – Choose high-quality, untreated seeds that are specifically labelled for microgreens. Some popular microgreen seeds include radish, broccoli, rocket and wheatgrass. Choose seeds that have a high germination rate and are free of pesticides and chemicals.
Seed density – Microgreens need to be grown at the right density to ensure healthy growth. Sow seeds thickly, but not too densely, as overcrowding can lead to poor air circulation and mould growth.
Pre-soak seeds – Some seeds, such as chia or linseed, can be pre-soaked in water for a few hours before sowing to improve germination.
Watering – Water your microgreens gently, taking care not to overwater. Keep the soil moist but not soggy, as too much moisture can lead to mould growth.
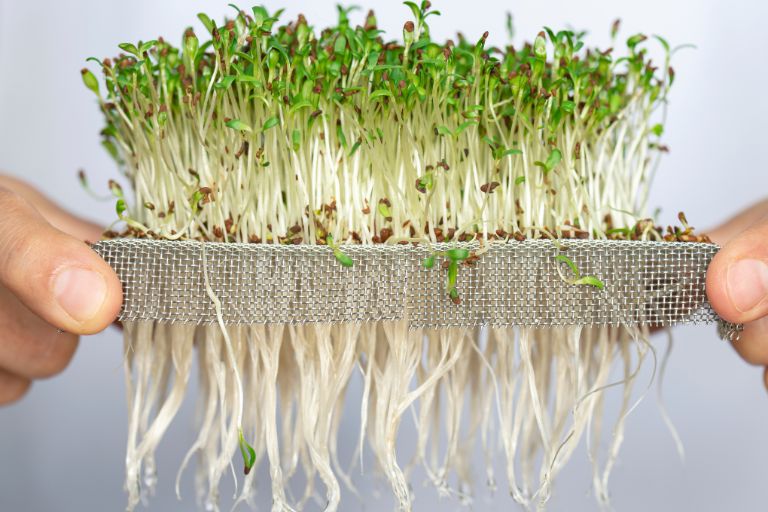
Drainage and Irrigation
Proper drainage and irrigation are critical to growing healthy microgreens. Here’s why it’s important:
Prevents waterlogging – Microgreens need to be watered regularly, but too much water can cause waterlogging, which can lead to root rot and mould. Proper drainage will allow excess water to escape and prevent waterlogging.
Improves nutrient uptake – Proper drainage and irrigation ensures that the microgreens’ roots have access to the right amount of water and nutrients. This results in healthy plant growth and improved nutrient uptake.
Prevents mould growth – Excess moisture and poor drainage can create a favourable environment for mould growth, which can damage microgreens and make them unsafe to eat. Proper drainage and irrigation can prevent mould growth and ensure that microgreens are safe to eat.
Helps maintain moisture – Regular watering of microgreens helps maintain proper humidity levels, which are essential for healthy plant growth. Proper watering can prevent microgreens from drying out and keep them moist.
To ensure proper drainage and watering, use containers with drainage holes and well-draining growing media. Water your microgreens gently, taking care not to overwater. Keep the soil moist but not soggy and avoid letting the soil dry out completely. Monitor your microgreens regularly and adjust your watering schedule as needed to ensure healthy growth.
Germinating Microgreens
Here are the steps to germinating microgreens and how to care for them as they grow:
Prepare the growing medium – Fill a container with a well-draining growing medium such as soil, coco or peat moss. Water the medium thoroughly and allow to drain.
Sow the seeds – Scatter the seeds evenly over the surface of the growing medium, taking care not to overcrowd them. Gently press the seeds into the soil or growing medium to ensure good contact.
Cover the seeds – Cover the seeds with a thin layer of soil or growing medium to protect them from light and keep them moist.
Water the seeds – Gently water the seeds with a spray bottle or watering can with a fine nozzle. Take care not to overwater as excess water can lead to waterlogging and mould growth.
Provide light – Microgreens need plenty of light to grow, so place them in a bright spot or under a grow light. Leave the light on for 12-16 hours a day.
Maintain humidity – Microgreens prefer a humid environment, so use a spray bottle or humidifier to keep the humidity between 50-60%.
Monitor growth – Check your microgreens daily and remove any seed pods or debris that may be blocking their growth. Adjust the lighting and watering schedule as necessary.
Harvest – Microgreens are usually ready to harvest after 7-14 days, depending on the variety. Use sharp scissors to cut the microgreens just above the soil or growing medium.
Storage – Store harvested microgreens in a sealed container in the refrigerator for up to one week.
By following these steps you can ensure that your microgreens germinate successfully and grow into healthy, nutritious plants. Regular monitoring and maintenance will help you catch any problems early and ensure a bountiful harvest.
Temperature and Lighting
Monitoring and adjusting temperature and lighting are crucial to the successful growth of microgreens. Some popular tips include:
Temperature – Microgreens prefer temperatures between 60-75°F (15-24°C) for optimal growth. Monitor the temperature with a thermometer and adjust as needed by moving your trays to a warmer or cooler location.
Lighting – Microgreens need plenty of light to grow, and natural light is often insufficient. Use a grow light to provide the required spectrum and intensity of light. Adjust the distance between the grow light and your microgreens to ensure they receive the optimum amount of light. Most microgreens require 12-16 hours of light per day.
Light intensity – Regularly check the intensity of the grow light with a light meter. If the light intensity is too low, move the light closer to the microgreens. If it’s too high, move the light further away or reduce the duration of the light.
Light spectrum – Different types of microgreens require different light spectrums for optimum growth. For example, blue and red light spectrums are ideal for most microgreens, but some varieties may benefit from green light. Choose a grow light with a spectrum that suits the types of microgreens you are growing.
Light timing – Timing is important when it comes to light exposure. Most microgreens require 12-16 hours of light per day, but some varieties may require less. Adjust the timing of your grow light to suit the needs of your microgreens.
By regularly monitoring and adjusting temperature and light conditions, you can ensure that your microgreens grow healthily and produce high yields. Remember to keep a record of your adjustments so you can see what works best for your specific microgreens.
Care and Maintenance
Proper watering, fertilising and pest control are all important aspects of growing microgreens. Here’s why it’s important:
Watering – Microgreens need consistent and adequate watering to thrive. Overwatering can lead to mould growth and root rot, while underwatering can cause stunted growth and wilting. Water your microgreens regularly, but be careful not to saturate the soil or growing medium. Use a watering can with a fine nozzle or a spray bottle to gently water the microgreens, keeping the soil moist but not soggy.
Fertilise – Microgreens need a balanced supply of nutrients to grow healthily and produce high yields. Use a good quality organic fertiliser or compost to provide essential nutrients such as nitrogen, phosphorus and potassium. Follow the recommended dosage and frequency to avoid over-fertilising, which can lead to burn and other nutrient-related problems.
Pest control – Microgreens are susceptible to pests such as aphids, spider mites and thrips, which can damage or kill the plants. Use organic pest control methods such as neem oil, insecticidal soap or diatomaceous earth to control pest infestations. Inspect your microgreens regularly for signs of pest damage and take immediate action to prevent further damage.
Proper irrigation, fertilisation and pest control are essential for the health and growth of microgreens. By following these best practices, you can ensure that your microgreens grow vigorously and produce delicious and nutritious crops. Remember to keep a record of your watering, fertilising and pest control schedules so that you can identify any problems and make adjustments as necessary.
Common Problems
Despite your best efforts, you may encounter some common problems when growing microgreens. Some troubleshooting tips for the most common problems include:
Mould and fungal growth – Over-watering or excessive humidity can cause mould and fungal growth on your microgreens. To prevent mould, make sure your microgreens have good air circulation and avoid over-watering. If you notice mould, remove the affected plants and reduce watering. You can also try using a diluted solution of hydrogen peroxide or apple cider vinegar to kill the mould.
Wilting – Wilting is often a sign of inadequate watering. Check the soil moisture level and water the microgreens as needed. If the soil is dry, water your microgreens thoroughly and allow the excess water to drain away. If your microgreens are still wilting, this may be a sign of root rot. Check the roots for signs of rot and transplant your microgreens to a new container with fresh soil if necessary.
Leggy growth – Leggy growth occurs when microgreens grow tall and spindly due to a lack of light. To prevent leggy growth, make sure your microgreens have access to enough light. Adjust the distance between the grow light and your microgreens or increase the duration of the light.
Yellowing leaves – Yellowing leaves can be a sign of nutrient deficiency or over-fertilisation. Check your fertiliser schedule and reduce or increase the dosage as necessary. Yellowing leaves can also be a sign of pest damage, so check your microgreens for signs of infestation.
Bent or curled leaves – Bent or curled leaves can be a sign of high humidity, pest damage or excessive heat. Make sure your microgreens have good air circulation and adjust humidity and temperature as needed. Inspect your microgreens for signs of pest damage and take immediate action to control infestations.
Troubleshooting and addressing these common problems in a timely manner will help your microgreens grow healthily and produce high yields. Remember to keep a record of your observations and adjustments so that you can identify any recurring problems and make improvements to your growing methods.
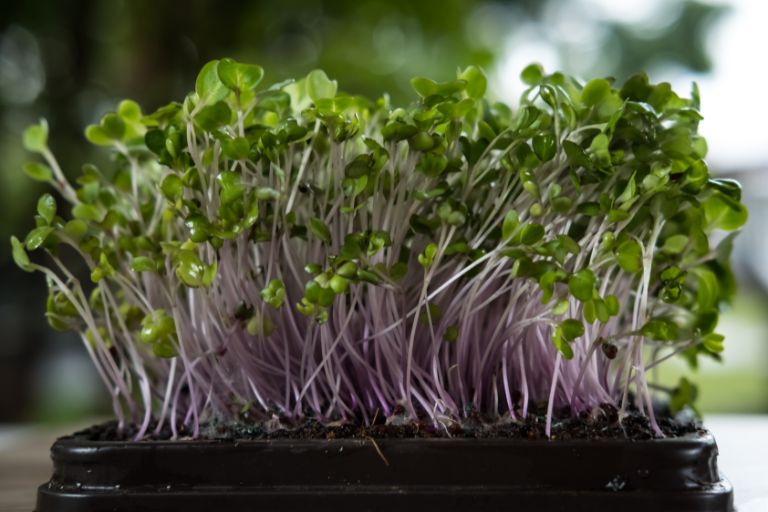
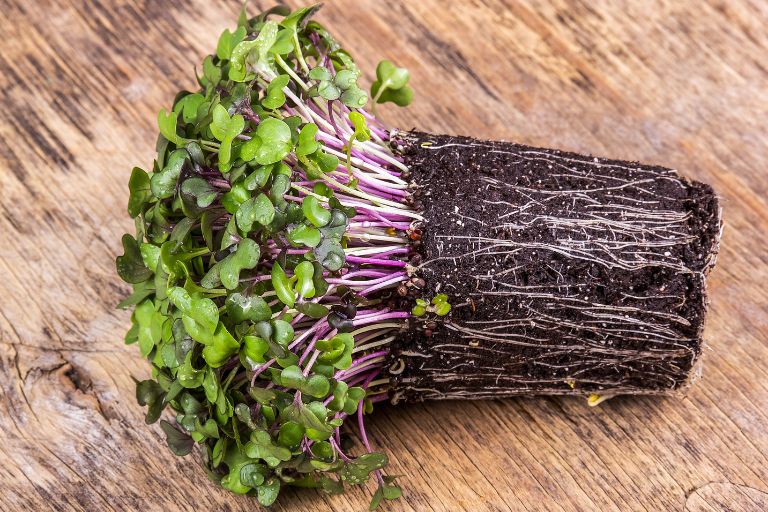
Ways to Harvest Microgreens
Microgreens can be harvested at different stages of growth, depending on your personal preferences and the type of microgreens you are growing. Some of the common ways to harvest microgreens are:
Cotyledon stage – The cotyledon stage is the earliest stage of growth where the microgreen has two small leaves. At this stage, the microgreens have a milder flavour and are best used as a garnish or in salads. Harvest the microgreens by gently cutting the stem just above the soil surface.
First true leaf stage – The first true leaf stage is when the microgreens have grown their first set of true leaves, which resemble the mature leaves of the plant. At this stage the microgreens have a stronger flavour and can be used in a wider range of dishes such as sandwiches, soups and stir-fries. Harvest microgreens by cutting the stem just above the soil surface.
Second true leaf stage – The second true leaf stage is when the microgreens have grown their second set of true leaves. At this stage the microgreens have a more developed flavour and can be used as a main ingredient in dishes. Harvest microgreens by cutting the stem just above the soil surface.
When harvesting microgreens, it is important to use clean and sharp scissors or a knife to avoid damaging the plants. Avoid pulling or tearing the microgreens as this can disturb the root system and affect future growth.
Microgreens can be harvested over several weeks as they continue to grow and produce new leaves. However, it is important not to let them get too big or overcrowded as this can affect their flavour and texture. Check your microgreens regularly for signs of readiness, such as the appearance of true leaves, and harvest as needed to enjoy their fresh and delicious flavour.
Storing and Using Microgreens
Microgreens are best used fresh, as their delicate texture and flavour can deteriorate quickly once harvested. However, with proper storage and handling, you can extend their shelf life and enjoy their nutritional and flavour benefits for longer. Some tips for storing and using microgreens include:
Store in the fridge – After harvesting, gently wash and dry the microgreens with a clean towel. Place them in a clean, airtight container or plastic bag and store in the fridge. They will keep for up to a week if stored in this way.
Handle with care – Microgreens are delicate, so handle them gently to avoid bruising or crushing. Avoid stacking or pressing them together too tightly as this can also cause damage.
Use as a garnish – Microgreens make a beautiful and flavourful garnish for a variety of dishes, from soups and salads to sandwiches and pizzas. Sprinkle them on top of your dishes just before serving to add a burst of freshness and colour.
Add to salads – Microgreens can add nutrition and flavour to any salad. Toss them with other greens, such as lettuce or spinach, and top with your favourite dressing and toppings.
Use in sandwiches – Microgreens can be used in place of lettuce in sandwiches to add crunch and flavour. They work well with a wide range of sandwich fillings, from cheese and meat to vegetables and spreads.
Blend into smoothies – Microgreens can be blended into smoothies for a nutritious and flavourful boost. Try adding them to your favourite smoothie recipe for an extra nutritional kick.
Follow these tips and you can enjoy the fresh and delicious flavour of microgreens in a variety of dishes. Remember to store them properly and handle them gently to preserve their delicate texture and flavour.
Health Benefits of Microgreens
Microgreens are becoming increasingly popular due to their many health benefits. Some popular reasons why microgreens are considered a superfood are:
High in nutrients – Microgreens are packed with nutrients, including vitamins, minerals and antioxidants. In fact, they can contain up to 40 times more nutrients than mature plants.
Improve digestion – Microgreens contain enzymes that can help improve digestion and nutrient absorption in the body.
Support the immune system – Microgreens are rich in antioxidants, which help protect the body from harmful free radicals and support a healthy immune system.
Reduced risk of chronic disease – Studies have shown that eating microgreens may help reduce the risk of chronic diseases such as heart disease, diabetes and cancer.
Easy to grow – Microgreens are easy to grow at home and can be harvested in just a few weeks, making them a convenient and inexpensive way to add fresh greens to your diet.
Microgreens are a convenient and nutritious way to add fresh greens to your diet. With their high nutrient content, they can help support a healthy immune system, improve digestion and reduce the risk of chronic disease. As more people become aware of the benefits of microgreens, they are becoming increasingly popular as a superfood.
Growing microgreens in your garage has many advantages. Firstly, it allows for year-round availability, as the controlled environment provides optimal growth conditions regardless of the season. Secondly, it is easy to maintain, requiring minimal effort and space. Finally, it is a cost-effective way to have a fresh supply of nutrient-rich greens at home. With the right temperature, lighting, humidity and ventilation, microgreens can be successfully grown in the garage with little effort. By following the right steps for germination, care and harvesting, you can enjoy the benefits of these nutritious greens in just a few weeks. Garage-grown microgreens are a convenient and rewarding way to add fresh greens to your diet. Not only are microgreens healthy and delicious, they are also cost-effective and require minimal maintenance. With the convenience and benefits of growing microgreens in your garage, there is no reason not to start your own microgreen garden today!