Garage Gardening Basics: A Beginner’s Guide to Successful Seed Starting
Starting seeds indoors in the garage offers gardeners the opportunity to extend their growing season, a boon especially for those in regions with short growing seasons. Indoor propagation allows precise control of growing conditions, including factors such as temperature, humidity and light, making it easier to create the optimum environment for seed germination and seedling development. Indoor seeding also expands the range of plants that can be grown, including those that are unsuitable for outdoor conditions in a given area. As well as increasing plant diversity, this method also saves money by eliminating the need to purchase mature plants from a nursery, providing a cost-effective way to grow a variety of plants for your garden. Indoor growing also offers protection from pests and diseases, reducing vulnerability and reliance on pesticides, thus safeguarding against potential crop losses.
Starting seeds indoors has many benefits for gardeners, starting with the prospect of an earlier harvest. By starting the growth process indoors, gardeners can start their plants before the outdoor planting season, potentially resulting in a more abundant crop that can be harvested earlier. Indoor seeding also provides a conducive environment for optimal growth conditions, resulting in higher germination rates and healthier seedlings compared to outdoor planting. This increased level of control also extends to plant varieties; growers have the flexibility to choose from a wider range of seeds and tailor the indoor growing environment to the specific needs of each plant variety. In addition, the indoor environment provides a protective haven for seedlings, shielding them from adverse weather conditions, pests and diseases that commonly affect outdoor plants. This protection not only promotes plant welfare, but also contributes to a more sustainable approach to gardening by reducing the need to purchase mature plants from nurseries, which often rely on chemical intervention. In essence, starting seeds indoors promotes a more efficient, successful and environmentally conscious gardening practice.
Garages offer a number of advantages for indoor gardeners. Firstly, their typically robust insulation provides superior temperature control compared to other areas of the home, making it easier to maintain optimum growing conditions for plants. In addition, the ample space offered by garages allows for the installation of shelving and lighting systems necessary for plant growth, while still leaving plenty of room for movement and work. In addition, greenhouses provide a protective shield against outdoor elements such as wind, rain and temperature fluctuations, ensuring a stable environment conducive to plant health. Furthermore, if fitted with windows or skylights, garages can use natural light to supplement artificial lighting, potentially reducing electricity costs. Importantly, using the garage to grow plants helps to maintain cleanliness in the living space by keeping dirt, debris and potential allergens at bay. This separation from the living area contributes to a healthier indoor environment. Finally, the versatility of garages as growing spaces accommodates a wide range of plant types, from flowers and herbs to vegetables, giving gardeners ample opportunity to experiment and grow.
Content Guide
Basics Of Seed Germination
Seed germination is the process by which a seed begins to grow and develop into a seedling. The basic steps in seed germination are as follows:
Water absorption – The first step in seed germination is for the seed to absorb water. The seed coat softens and swells, allowing water to enter the seed.
Activation of enzymes – Once the seed has absorbed water, enzymes inside the seed are activated to start the process of cell division and growth.
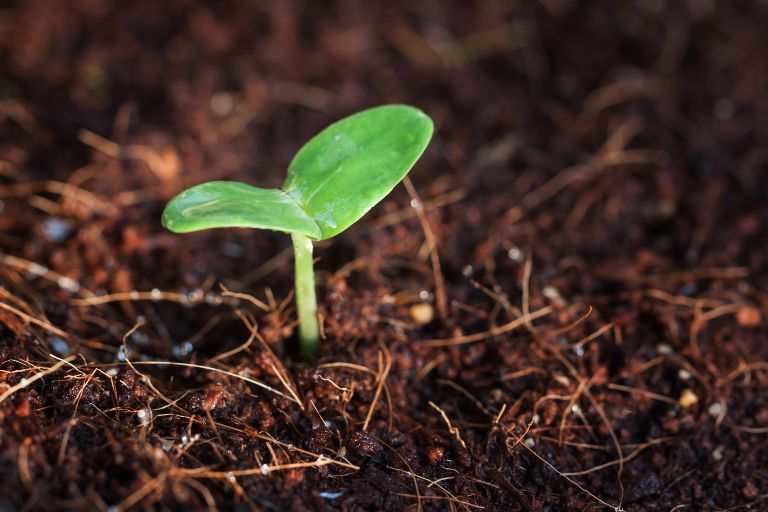
Root emergence – As the embryo begins to grow, a root emerges from the seed and begins to grow down into the soil.
Shoot emergence – As the root grows, a shoot emerges from the seed and grows upwards towards the surface.
Photosynthesis – When the shoot emerges from the soil, it begins to make its own food through photosynthesis, using light and carbon dioxide to produce glucose and oxygen.
For successful germination of seeds, the following factors must be taken into account:
Water – Seeds must be kept moist but not soaking wet to germinate properly. Water should be provided in such a way that it does not disturb or wash away the seeds.
Temperature – Different types of seed have different temperature requirements for germination. Some require warm temperatures while others require cooler temperatures. It is important to follow the recommended temperature range for each type of seed.
Light – Some seeds need light to germinate and some do not. This is often indicated on the seed packet or in growing guides.
Soil – Seeds need to be planted in a suitable growing medium, such as potting soil, which provides the right combination of nutrients and moisture to support germination.
Choosing the Right Seeds
Choosing the right seeds is an important part of successful gardening. Some factors to consider when choosing seeds include:
Climate and growing conditions – It’s important to choose seeds that are suitable for your climate and growing conditions. Consider the average temperatures, amount of sunlight and rainfall in your area and choose seeds that are known to thrive in these conditions.
Type of plant – Consider the type of plant you want to grow, such as vegetables, herbs, flowers or fruit. Choose seeds that are suitable for the type of plant you want to grow.
Seed quality – Choose quality seeds from a reputable source. Look for seeds that are fresh and free of damage or signs of disease.
Space available – Consider the amount of space you have in your garden and choose seeds that are suitable for the size of your garden.
Materials Needed
To start seeds in the garage, you will need the following materials:
Seed trays – These are shallow containers with drainage holes that hold the soil and seeds. Seed trays are usually made of plastic or biodegradable materials and come in a variety of sizes and configurations.
Potting soil – This is a high-quality soil mix that provides the nutrients and moisture needed for seeds to germinate and grow.
Seeds – Choose seeds that are suitable for the growing conditions in your area and that suit your personal preferences.
Grow lights – These are artificial lights that provide the necessary light for seedlings to grow. Grow lights come in several types, including LED, fluorescent and high-intensity discharge (HID).
Heating mat – This is an optional item that provides even bottom heat to the seed trays, which can help speed up germination.
Watering can or spray bottle – These are used for watering seeds and seedlings.
Thermometer – Used to monitor the temperature in the propagator to ensure it is within the correct range for seed germination and growth.
Fan – This is an optional item that can be used to improve air circulation around the seedlings and prevent disease.
Labels – These are used to identify the different types of seeds and seedlings.
Starting seeds in the garage requires a few basic materials, including seed trays, potting soil, seeds, grow lights, a heat mat, watering can or spray bottle, thermometer, fan and labels. With these materials and some basic gardening skills, gardeners can successfully start seeds in their garage and grow healthy seedlings.
Choosing the Best Location
Choosing the best seed starting location in your garage is important to ensure that your seedlings receive the right amount of light, temperature and humidity. Some factors to consider when choosing a seed starting location in your garage include:
Temperature – Most seeds require a warm and stable temperature to germinate. Choose a location in your garage that is relatively warm, such as near a heat source or insulated wall.
Light – Seedlings need enough light to grow properly. Choose a location that receives natural sunlight or invest in artificial grow lights to provide sufficient light.
Humidity – Seedlings need a certain level of humidity to prevent dehydration. Choose a location that is not too dry, such as a corner of your garage out of direct sunlight.
Air circulation – Good air circulation is important to prevent mould and disease. Choose a location with good air circulation, such as near an open window or door.
Space – Consider the amount of space available in your garage and choose a location that is appropriate for the size of your seed trays and grow lights.
Accessibility – Choose a location that is easily accessible so you can check on your seedlings and water them as needed.
Choosing the best location in your garage for starting seeds involves considering factors such as temperature, light, humidity, air circulation, space and accessibility. Choose the right location and you can create the optimum environment for seed germination and growth and ensure that your seedlings develop into healthy plants.
Shelving and Lighting
Setting up shelving and lighting is an important part of creating the optimum environment for seeds to germinate and grow in your garage. Some steps to follow when setting up shelving and lighting for seed starting in your garage include:
Determine the size and configuration of the shelving – Measure the space where you want to place your shelving and determine the size and configuration of the shelving that will fit in the space. Consider the size of your seed trays and grow lights and choose shelving that will accommodate the size of your seed trays.
Install the shelves – Install the shelves according to the manufacturer’s instructions, making sure they are stable and secure.
Choose Grow Lights – Choose grow lights that are appropriate for the size of your trays and the type of seeds you are growing. LED lights are energy efficient and emit very little heat, while fluorescent lights are less expensive and emit more heat. High Intensity Discharge (HID) lights are the most powerful, but also the most expensive.
Install grow lights – Install grow lights according to the manufacturer’s instructions, making sure they are positioned at the correct distance from the seed trays. The distance between the grow lights and the seed trays depends on the type of light and the growth stage of the seedlings.
Check the temperature – Use a thermometer to check the temperature in the area where the seed trays will be placed. Adjust the distance between the grow lights and the seed trays as necessary to maintain the correct temperature.
Adjust the height of the trays – Adjust the height of the shelves as necessary to ensure that the seedlings have enough room to grow and that the grow lights are positioned at the correct distance from the seed trays.
Monitor and adjust lighting – Monitor the seedlings and adjust the lighting as necessary to ensure they are receiving the correct amount of light for their stage of growth.
Choosing Containers
Choosing the right containers for your seedlings is important to ensure they have enough space to grow and develop healthy root systems. Some factors to consider when choosing containers for your seedlings include:
Size – Choose containers that are appropriate for the type of seed you are planting and the stage of growth. Seedlings need enough room to grow, but containers that are too large can retain too much moisture and cause root rot.
Material – Containers can be made from a variety of materials, including plastic, clay and biodegradable materials. Plastic containers are durable and lightweight, while clay containers are porous and allow air to circulate. Biodegradable containers, such as peat pots, can be planted directly into the soil, reducing the risk of transplant shock.
Drainage – Containers should have adequate drainage holes to prevent water from collecting at the bottom and causing root rot. If your containers don’t have drainage holes, you can drill them yourself.
Reusability – Consider the reusability of containers. Plastic containers can be reused, whereas biodegradable containers will degrade over time and need to be replaced.
Availability – Choose containers that are readily available and affordable. You can also reuse containers from around the house, such as egg cartons or yoghurt pots.
Preparing soil mix and containers
Preparing the soil mix and containers is an important step in starting seeds in your garage. Some tips on how to prepare the soil mix and containers for your seedlings include:
Choose the right soil mix – Use a soil mix that is appropriate for the type of seed you are planting. Seed starting mixes are available from most garden centres and are specially formulated to provide the ideal environment for seeds to germinate and grow.
Add nutrients – Starter mixes may not contain enough nutrients to sustain your seedlings throughout the growing season. To add nutrients you can mix in a slow release fertiliser or compost.
Sterilise the potting mix – Before using the potting mix, you can sterilise it to kill any pathogens or weed seeds. This can be done by placing the potting mix in a heat-safe container and baking it in the oven at 180-200°F for 30 minutes.
Choose the right containers – Choose containers that are the right size for the type of seed you are planting and have adequate drainage holes. Biodegradable containers, such as peat pots, can be planted directly into the soil and reduce the risk of transplant shock.
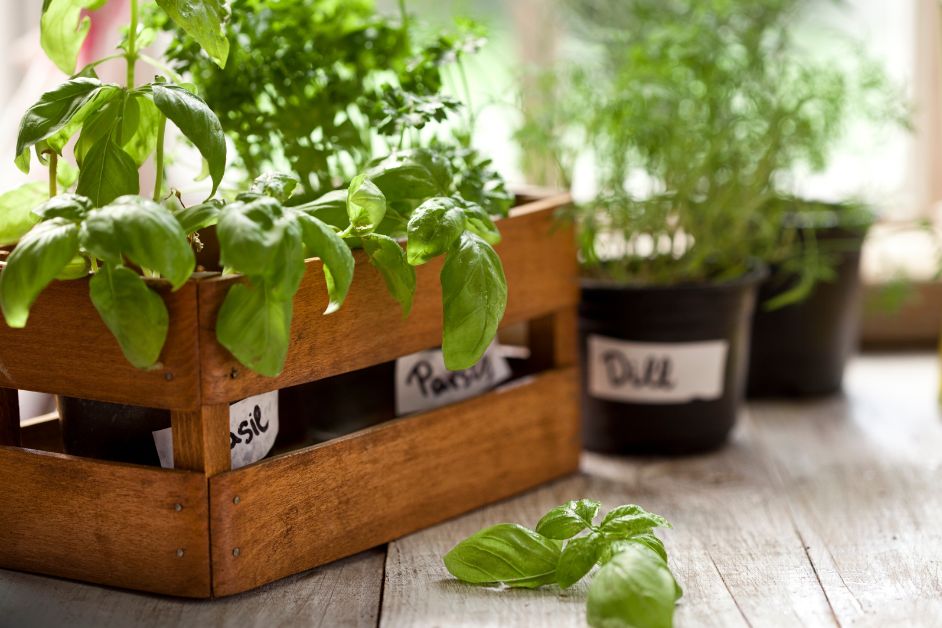
Label the containers – Label each container with the name of the seed and the date it was planted. This will help you keep track of which seedlings are doing well and which need more attention.
Moisten the potting mix – Moisten the potting mix before filling the containers. The soil should be moist but not soggy.
Fill the containers – Fill each container with potting mix, leaving about half an inch of space at the top. Press the soil down gently to remove any air pockets.
Preparing potting mix and containers requires attention to detail and careful consideration of the needs of your seedlings.
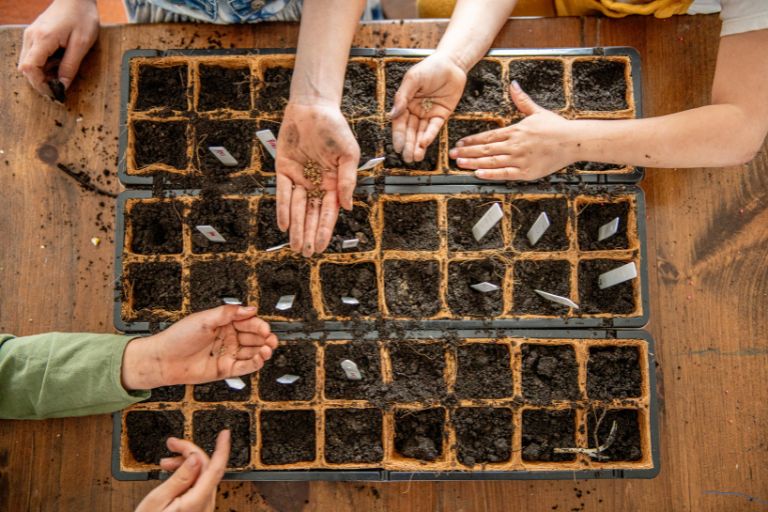
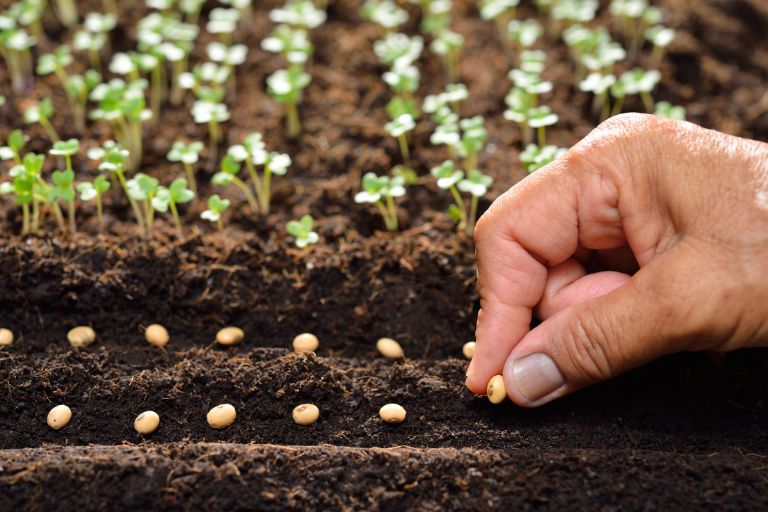
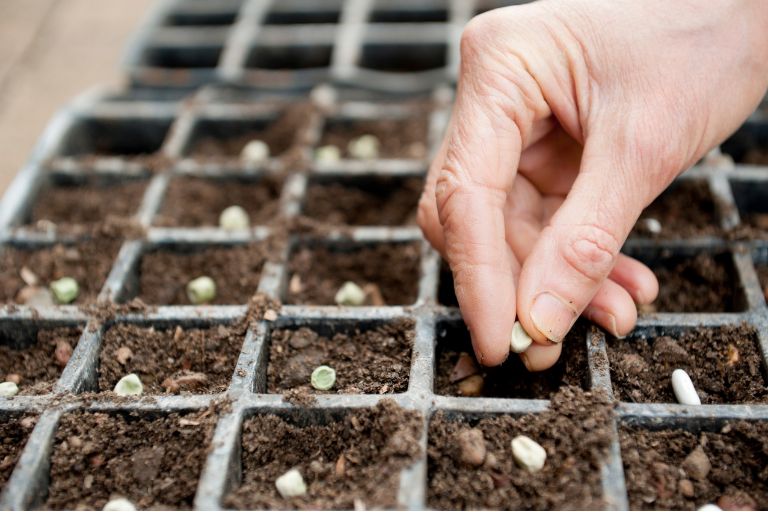
Planting Seeds
Planting seeds is the next step in starting your indoor garage garden. Some seed planting tips are:
Read the seed packet – Read the seed packet to find out the ideal planting depth and spacing for the seeds you are planting.
Make holes – Use a pencil or your finger to make holes in the soil mix. The depth of the hole should be slightly deeper than recommended on the seed packet.
Add seeds – Place one or two seeds in each hole. If you are planting small seeds, you can scatter them on top of the soil and gently press them in.
Cover seeds – Cover seeds with soil mix, pressing down gently to ensure contact with the soil.
Water – Gently water the soil with a watering can or spray bottle. Make sure the soil is moist but not soggy.
Label the containers – Label each container with the name of the seed and the date it was planted. This will help you keep track of which seedlings are growing well and which need more attention.
Cover the containers – Cover each container with a clear plastic dome or plastic wrap to create a mini greenhouse environment. This will help retain moisture and heat to aid germination.
Place the containers – Place the containers in a warm, well-lit area of your garage. Consider using a grow light if natural light is not sufficient.
Monitor – Check the seedlings daily and water as needed. Remove the plastic cover as soon as the seedlings start to emerge.
Planting seeds requires attention to detail and careful consideration of your seedlings’ needs. By reading the seed packet, making holes, adding seeds, covering with soil, watering, labelling, covering, placing in a warm, well-lit area and monitoring, you can ensure that your seedlings germinate and grow into healthy plants.
Watering and Fertilizing
Watering and fertilising are crucial steps in the process of starting seeds in your garage. Some tips on how to properly water and feed your seedlings include:
Watering – Water your seedlings regularly, keeping the soil evenly moist but not soggy. Overwatering can cause root rot, so make sure the soil drains well. Water from below to avoid water getting on the leaves, which can cause fungal diseases. Use a watering can with a spout or a spray bottle to avoid disturbing the soil and delicate seedlings.
Fertilise – Starter mixes may not contain enough nutrients to sustain your seedlings throughout the growing season. You can start feeding your seedlings with a weak solution of liquid fertiliser when they have developed their second set of leaves. Choose a fertiliser formulated for seedlings with a balanced mix of nitrogen, phosphorus and potassium. Over-fertilising can burn the leaves, so follow the instructions on the fertiliser packet and start with a weak solution.
Organic fertiliser – If you prefer organic gardening, there are several natural fertilisers that can be used to feed your seedlings. Compost tea, fish emulsion and seaweed extract are all good options. You can also add a slow-release organic fertiliser to the soil mix before planting.
Time of day – Water your seedlings early in the day to give the leaves time to dry before nightfall. This will help prevent fungal diseases.
Soil moisture – Check soil moisture regularly to make sure your seedlings are getting enough water. Stick your finger into the soil up to the first knuckle. If the soil feels dry, it’s time to water.
Watering and fertilising requires attention to detail and careful consideration of your seedlings’ needs. By watering regularly, using the right fertiliser, choosing organic options where appropriate, watering at the right time of day and checking soil moisture, you can ensure that your seedlings get the nutrients and water they need to grow into healthy plants.
Temperature and humidity
Temperature and humidity are important factors to consider when starting seeds in your garage. Some guidelines to help you maintain the ideal temperature and humidity for your seedlings include:
Temperature – Most seeds will germinate best at temperatures between 60-75°F (15-24°C). After germination, seedlings generally prefer slightly cooler temperatures of around 60-70°F (15-21°C). Consider using a thermometer to monitor the temperature in your garage and adjust if necessary. You can also use a heating mat or heat the garage with a space heater, but follow the manufacturer’s instructions to avoid overheating.
Humidity – Seedlings need high humidity to germinate and take root. Consider using a plastic cover or dome to trap moisture during germination. After germination you can remove the cover to allow air circulation and reduce the risk of fungal disease. Aim for a humidity level of around 50-70% for your seedlings. You can measure the humidity with a hygrometer or by observing the moisture on the inside of the plastic cover.
Air circulation – Good air circulation is important to prevent fungal diseases and to ensure that your seedlings grow strong stems. Use a fan to circulate air in the garage or open windows and doors to allow natural airflow.
Adjusting humidity – If the humidity in your garage is too low, you can increase it by placing a tray of water near the seedlings or using a humidifier. If the humidity is too high, you can reduce it by opening windows and doors or using a dehumidifier.
Monitor and adjust – Monitor and adjust temperature and humidity regularly. Your seedlings may have specific temperature and humidity preferences depending on the type of plant, so do some research and adjust accordingly.
Maintaining the ideal temperature and humidity for your seedlings requires attention to detail and careful monitoring.
Lighting and Watering
As your seedlings grow, their lighting and watering needs will change. Some tips on how to adjust the lighting and watering for your seedlings include:
Lighting – As seedlings grow, they need more light to support their growth. If you’re using artificial lighting, adjust the height of the light source as the seedlings grow taller. The aim is to keep the light source about 2-3 inches (5-7 cm) above the tops of the seedlings. If the light source is too far away, the seedlings may become leggy and weak. If the light source is too close, the seedlings may become too hot and dry out.
Water – As the seedlings grow, their root systems will develop and they will need more water. Check the soil moisture regularly and water the seedlings when the top of the soil feels dry. Water thoroughly, making sure the water reaches the bottom of the container. Avoid overwatering as this can lead to root rot and fungal diseases. Adjust the frequency and amount of watering as needed according to the growth rate of the seedlings.
Nutrients – As seedlings grow, they need more nutrients to support their growth. Consider adding a balanced fertiliser to the soil or using a nutrient-rich, water-soluble fertiliser. Follow the instructions on the fertiliser package and avoid over-fertilising as this can damage the seedlings.
Transplanting – When your seedlings have outgrown their containers, it is time to transplant them into larger containers or the ground. Be careful not to damage the seedlings’ delicate root systems. Transplanting can be stressful for seedlings, so make sure they have plenty of water and light after transplanting.
Adjusting the lighting and watering for your seedlings requires careful monitoring and attention to their growth rate and needs. Make adjustments as needed and provide adequate nutrients and care and you can help your seedlings grow into healthy, strong plants.
Common Problems
Damping-off is a fungal disease that affects seedlings and is caused by soil-borne pathogens. It can be a common problem when starting seeds indoors or in the garage, but there are steps you can take to prevent it:
Use clean containers – Before planting your seeds, make sure your containers are clean and sterilised. You can use a 10% bleach solution to clean them or buy new ones.
Use a sterile seed mix – Use a sterile seed mix to reduce the risk of soil-borne pathogens. Avoid using garden soil, which may contain fungal spores.
Avoid over-watering – Powdery mildew thrives in wet, damp conditions. Allow the soil to dry slightly between waterings to reduce the risk of disease.
Ensure good air circulation – Damping-off can also be prevented by ensuring good air circulation around the seedlings. Use a fan or open windows and doors to increase airflow.
Remove infected seedlings – If you notice seedlings showing signs of damping-off, such as wilting or falling over, remove them immediately to prevent the disease from spreading.
Apply fungicides – If damping-off becomes a persistent problem, consider treating the soil with a fungicide. Look for products containing copper, sulphur or Bacillus subtilis, which are effective against damping-off.
Preventing damping-off requires a combination of good hygiene practices, proper watering and adequate air circulation. Follow these guidelines and you can reduce the risk of damping-off and give your seedlings a healthy start.
When to Transplant Seedlings
Transplanting seedlings should be done when they have outgrown their current containers and have developed a strong root system. Some signs to look out for when it’s time to transplant your seedlings include:
Crowded roots – If you see roots growing out of the drainage holes or around the inside of the container, it’s a sign that the seedlings have outgrown their current container.
Slow growth – If your seedlings seem to have stopped growing or are growing very slowly, this could be a sign that they need more space and nutrients.
Yellowing leaves – If the lower leaves of your seedlings are turning yellow and falling off, this could be a sign of overcrowding and lack of nutrients.
Wilting – If your seedlings are wilting even though the soil is moist, this could be a sign that they need more space and air circulation.
Once you’ve decided that it’s time to transplant your seedlings, there are a few general guidelines that you should follow:
1. Choose a container that is at least 2-3 inches (5-7 cm) larger in diameter than the current container.
2. Fill the new container with a fresh potting mix suitable for the type of plant you are growing.
3. Carefully remove the seedling from its current container, being careful not to damage the roots.
4. Place the seedling in the new container and add potting mix around the roots.
5. Water the seedling well and place it in a bright, sunny spot.
6. Do not disturb the seedling for a few days to allow it to recover from transplant shock.
Transplanting seedlings can be a delicate process, but with the right care and attention your seedlings will quickly adapt to their new containers and continue to thrive.
Hardening Off Seedlings
Hardening is the process of gradually acclimatising seedlings to outdoor conditions before transplanting them into the garden. This process is important to prevent shock and stress to the plants, which can lead to stunted growth or death. Some steps to follow when hardening seedlings include:
1. Start the process about 1-2 weeks before you plan to transplant your seedlings. Choose a location that is sheltered from strong winds and direct sunlight.
2. Start by exposing the seedlings to outdoor conditions for 1-2 hours a day, gradually increasing the time and intensity over the course of a week.
3. Bring the seedlings indoors for the first few days or cover them with a light cloth or row cover during the hottest part of the day.
4. Water seedlings well before and after each hardening off period to prevent stress and dehydration.
5. Gradually reduce the amount of water given to the seedlings as you increase their exposure to outdoor conditions.
6. Monitor seedlings closely during hardening for signs of stress such as wilting or yellowing of leaves. If you see signs of stress, reduce the intensity or duration of outdoor exposure.
7. Once the seedlings have been exposed to outdoor conditions for several hours a day for at least a week, they are ready to be transplanted into the garden.
Hardening seedlings requires patience and attention, but it is an important step in ensuring the health and success of your plants. Follow these guidelines and you can help your seedlings make a smooth transition from the controlled environment of your garage to the unpredictable conditions of the garden.
Planting Seedlings
Once your seedlings have hardened off properly and are ready to be transplanted into larger pots, here are some general guidelines to follow:
1. Choose a planting site that is suitable for the type of plant you are growing, taking into account factors such as soil type, sun exposure and moisture levels.
2. Prepare the planting site by removing any weeds or debris and loosening the soil to a depth of at least 6-8 inches (15-20 cm).
3. Dig a hole slightly larger than the seedling’s root ball. Make sure the seedlings are spaced according to the recommended spacing guidelines.
4. Carefully remove the seedling from its container, being careful not to damage the roots.
5. Place the seedling in the hole and fill in the soil around the roots, tamping down firmly to remove any air pockets.
6. Water the seedling well and mulch around the base of the plant to retain moisture and suppress weeds.
7. Continue to water the seedling regularly for the first few weeks after transplanting, taking care not to overwater.
8. Monitor the plant closely for signs of stress or disease and take appropriate action if necessary.
Starting seeds indoors can help improve the success of your garden by giving you greater control over growing conditions, allowing earlier planting, promoting healthier plants, offering a wider variety of plant species and saving money.
Starting seeds in the garage can be a rewarding and cost-effective way to grow your own plants, with the added benefits of greater control over growing conditions and access to a wider variety of plant species. Whether you are an experienced gardener or just starting out, starting seeds indoors can help you achieve a more successful garden by promoting healthy seedling growth, giving you earlier planting options and allowing you to experiment with new plant varieties.
With a few basic materials and some careful attention to growing conditions, you can successfully start seeds in your garage and enjoy the benefits of home-grown plants. Remember to choose the right seeds, containers and growing medium, and to provide the right light, temperature and humidity for your seedlings. Planting seedlings in larger pots requires attention to detail and proper care, but with the right preparation and maintenance your plants will quickly adapt to their new environment and continue to thrive.