A Guide to Harvesting and Storing Seeds from Indoor Plants
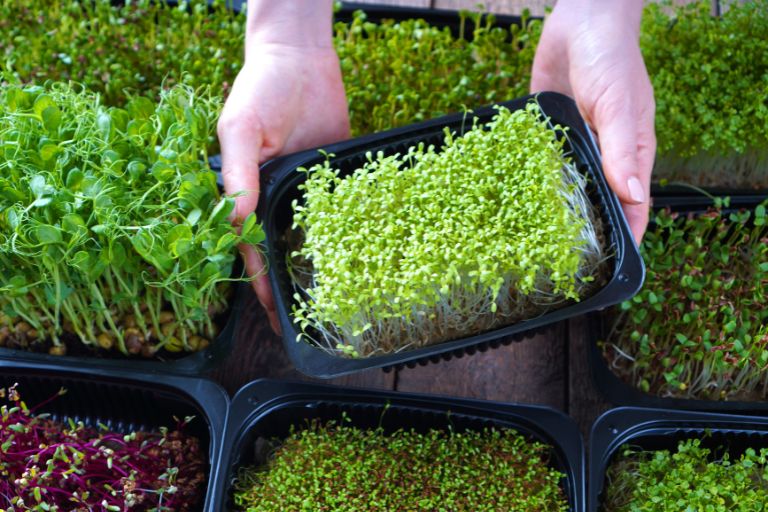
The garage has emerged as an unexpected haven for cultivating lush vegetation in the ever-expanding world of gardening, where green space is at a premium. Whether it’s the city dweller seeking a touch of greenery or the seasoned gardener adapting to seasonal constraints, the garage offers a versatile sanctuary for growing a variety of plants. But amidst the hustle and bustle of tending to these indoor green havens lies an often overlooked treasure trove: seeds.
The journey from garage to garden is more than just growing; it’s a holistic experience that encompasses the entire life cycle of plants. At the heart of this cycle is the practice of harvesting and saving seeds, a fundamental but often neglected aspect of gardening. In this article we delve into the art and science of seed saving within the confines of garage gardening, exploring the importance, techniques and benefits of preserving these tiny but potent vessels of life.
Join us as we uncover the secrets to transforming your garage oasis into a sustainable seed bank, ensuring not only the continuity of your indoor garden, but also a deeper connection to the cyclical rhythms of nature. From identifying seed-ready plants to mastering the delicate art of seed saving, join us on a journey that celebrates the beauty and resilience of life, one seed at a time.
This post may contain affiliate links. As an Amazon Associate I earn from qualifying purchases at no extra cost to you.
Content Guide
Essential Seed Saving Tools
Before you begin, having the right tools makes everything smoother and more successful:
- Fine Mesh Sieve
- Airtight Glass Jars
- Silica Gel Moisture Absorbers
- Seed Organiser Box or Envelopes
- Waterproof Marker or Label Maker
The Importance of Seed Harvesting
Harvesting seed from garage plants has many benefits beyond the immediate satisfaction of a successful harvest.
Maintain genetic diversity – Garage gardening often involves growing a variety of plant species, including heirloom and open-pollinated varieties. By harvesting seeds from these plants, gardeners actively contribute to the preservation of genetic diversity. Unlike commercially produced hybrid seeds, which often prioritise specific traits, saved seeds from garden plants carry the genetic traits best suited to their local environment. Over time, this promotes plant resilience and adaptability, safeguarding against the risks associated with monoculture and preserving biodiversity.
Save money on buying new seed – One of the most tangible benefits of seed saving is the significant cost savings it offers. Buying seeds can be a recurring expense for gardeners, especially those who prefer organic or speciality varieties. By collecting and storing seeds from garage plants, gardeners can eliminate the need to buy new seeds for each planting season. This not only reduces gardening costs, but also allows gardeners to invest their resources in other aspects of their garden, such as soil health, irrigation systems or additional plant varieties.
Promotes self-sufficiency in gardening – Seed saving fosters a sense of self-sufficiency and empowerment among gardeners. By mastering the art of seed saving, gardeners become less dependent on outside sources for their gardening needs. They gain the confidence to sustain their garden from one season to the next, relying on their own resources rather than external suppliers. This self-sufficiency is particularly valuable in times of economic uncertainty or disruption to the supply chain, as gardeners can continue to grow and propagate plants independently. With a simple storage system like airtight jars paired with silica gel packs you can maintain your own seed bank year-round.
Harvesting and saving seeds from garage plants is more than just a practical gardening task. It’s a deeply rewarding and soulful experience that fosters a deep sense of connection with the natural world.
A tangible connection to nature – When gardeners carefully collect seeds from their beloved garage plants, they are engaging in a timeless ritual that connects them directly to the cycles of nature. This hands-on process allows them to witness the miracle of life first-hand, from the vibrant flowers and lush foliage of their plants to the tiny seeds that hold the promise of future growth. In this way, the seed harvest becomes a tangible expression of our connection to the earth and its rhythms.
A celebration of growth and renewal – Harvesting seeds embodies the essence of growth and renewal, encapsulating the cycle of life in the palm of our hands. As gardeners carefully pluck ripe seeds from dried pods or fruits, they participate in a timeless dance of creation and regeneration. The act of gathering seeds becomes a celebration of the abundance of life and the infinite potential that lies within each tiny seed.
A sense of accomplishment and mastery – There’s a unique sense of satisfaction that comes from successfully harvesting and saving seeds. Gardeners take pride in their ability to grow plants from seed to maturity, and collecting seeds is the culmination of that journey. It’s a tangible reminder of their skill, patience and dedication as stewards of the garden. Whether it’s saving the seeds of a rare heirloom variety or simply saving the seeds of a favourite plant, each harvest represents a small victory in the ongoing saga of gardening.
A link to past and future generations – When gardeners save seeds, they are not only preserving the present, they are honouring the past and investing in the future. Many heirloom varieties have been passed down through generations, carrying with them stories, traditions and cultural heritage. By saving seeds from heirloom plants, gardeners become custodians of this rich heritage, ensuring that it continues for generations to come. In this way, seed saving becomes a bridge that connects us to our ancestors and paves the way for future generations to continue the cycle of growth and renewal.
Identifying Seed Ready Plants
Recognising when plants are ready for seed harvesting is essential to ensure that seeds are collected at the peak of maturity and viability. The following is a guide to identifying visual cues that indicate seed harvesting readiness.
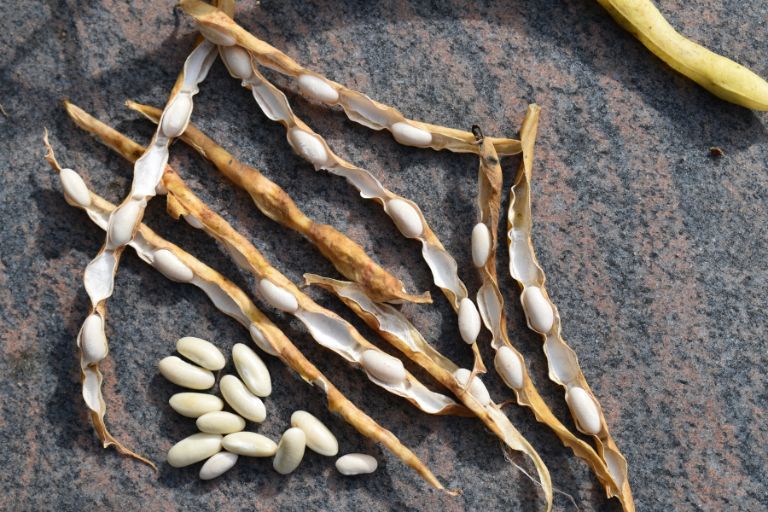
Dried seed pods or seed heads – Many plants produce seed pods or seed heads that mature and dry out as the seeds ripen. Look for signs that the seed pods have turned brown or tan and feel dry to the touch. In some cases, the pods may begin to split or crack, indicating that the seeds are ready to be harvested. Examples of plants with seed pods are peas, beans and poppies.
Mature fruits – For plants that produce seeds in fruit, such as tomatoes, peppers and cucumbers, look for signs that the fruit is fully ripe. This may include changes in colour, such as tomatoes turning red or peppers changing from green to their ripe colour. The fruit should also feel firm and have a slightly soft texture, indicating that the seeds inside are fully developed.
Dried flower heads – Some flowering plants produce seeds in the dried flower heads after the petals have wilted and fallen off. Look for flower heads that have turned brown or have a papery texture, indicating that the seeds inside have matured. Gently shake the flower heads or run your hand over them to release the seeds, which should be dark in colour and firm to the touch.
Seed dispersal mechanisms – Look for any natural mechanisms the plant uses to disperse its seeds. Some plants, such as dandelion and milkweed, produce fluffy seeds that are dispersed by the wind when the seed heads are fully mature. Others, such as burdock and cleavers, have seeds that stick to clothing or animal fur for dispersal. When you see these mechanisms in action, it’s usually a sign that the seeds are ripe and ready to be collected.
Seed colour and texture – In general, ripe seeds tend to be darker in colour and firmer in texture than immature seeds. Look closely at the seeds themselves to assess their readiness for harvesting. If the seeds are still soft, pale or plump, they may need more time to mature before harvesting.
Harvesting Techniques
The following are different methods for collecting seeds from different types of plants commonly grown in garages.
Vegetables
Tomatoes
- Select fully ripe tomatoes from healthy plants.
- Cut the tomato in half and scoop out the seeds along with the gel-like substance that surrounds them. A small stainless steel spoon set works well.
- Place the seeds and gel in a container and add water. A glass mixing bowl is ideal.
- Leave to ferment for a few days until a mould forms on the surface and the seeds sink to the bottom.
- Rinse the seeds thoroughly to remove the gel and debris, then spread them out on a paper towel or sieve to dry.
Peppers
- Allow the peppers to fully ripen on the plant until they turn their characteristic colour (e.g. red, orange, yellow).
- Cut the pepper open and remove the seeds.
- Spread the seeds out to dry on a paper towel or sieve, making sure they do not touch each other to prevent mould. A drying tray or mat works well.
Beans and peas
- Allow the pods to dry completely on the plant until they are brown and crispy.
- Harvest using sharp pruning scissors to avoid damage
- Spread the seeds out to dry thoroughly before storing.
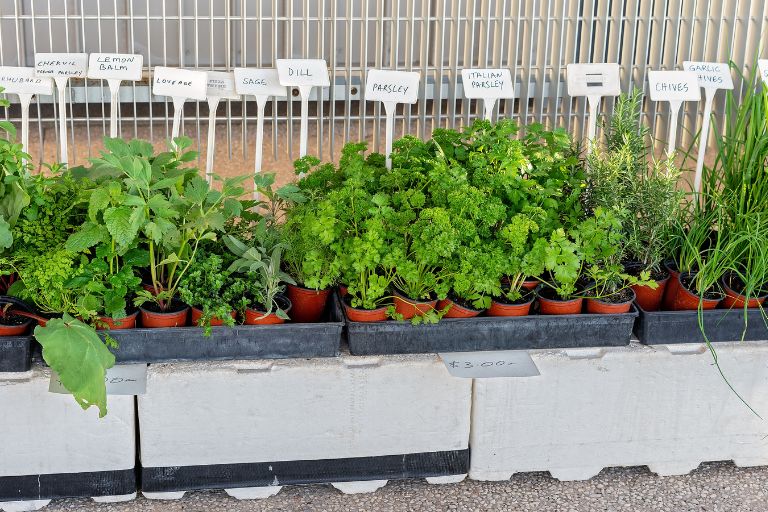
Herbs
Basil, parsley, coriander
- Allow the herb plants to bolt and produce flowers.
- Once the flowers have dried and turned brown, carefully shake or brush the seeds from the flower heads into a container. Use a small brush or tweezers set for delicate seeds.
- Remove any remaining chaff and debris from the seeds before storing.
Dill
- Allow the dill plant to produce mature seed heads.
- Cut the seed heads from the plant and place them upside down in a paper bag.
- Hang the bag in a warm, dry place to allow the seeds to dry completely.
- Gently shake the bag to release the seeds, then remove the chaff and store the seeds in a container.
Flowers
Marigolds
- Allow the marigold flowers to fully ripen and dry on the plant.
- When the petals have wilted and fallen off, cut off the dried flower heads and place them in a paper bag.
- Shake the bag gently to release the seeds from the flower heads.
- Remove any remaining chaff and store the seeds in a container.
Zinnias
- Allow the zinnia flowers to fully mature on the plant until the petals begin to dry and turn brown.
- Cut off the flower heads and place them in a paper bag.
- Shake the bag gently to release the seeds from the flower heads.
- Remove any remaining chaff and store the seeds in a container.
Gentle extraction is essential to preserve the viability of seeds and ensure successful future planting. The following are some tips on how to gently extract seeds from various plants while minimising damage.
Tomatoes, peppers and other fleshy fruits
- Use a spoon or your fingers to scoop out the seeds along with the surrounding flesh.
- Avoid squeezing or crushing the seeds when removing them from the fruit.
- Gently rinse the seeds under running water to remove excess flesh, taking care not to damage the seeds.
Beans and peas
- Peel the pods carefully to remove the seeds without crushing them.
- Avoid using excessive pressure to avoid damaging the seeds.
- If necessary, use a gentle tapping motion to loosen the seeds from the pods.
Herbs (basil, parsley, coriander)
- Gently shake or brush the seeds from the dried flower heads.
- Avoid vigorous shaking, which can damage the delicate seeds.
- Use your fingers to gently separate the seeds from any remaining chaff or debris.
Dill and similar seed heads
- Handle seed heads carefully to avoid breaking them apart.
- Hang the seeds upside down in a paper bag and allow them to dry naturally.
- Avoid crushing or squeezing the seed heads as this may damage the seeds inside.
Flowers (marigolds, zinnias)
- Cut off the dried flower heads and place in a paper bag for seed collection.
- Gently shake the bag to release the seeds from the flower heads without damaging them.
- Use your fingers to separate the seeds from any remaining flower debris or chaff.
General tips
- Work with dry seeds whenever possible as wet seeds are more susceptible to damage.
- Use gentle movements and handling techniques to minimise the risk of seed damage.
- Take your time and exercise patience during the seed extraction process to ensure careful handling.
- If necessary, use tools such as tweezers or small brushes to assist in extracting seeds from confined spaces or delicate structures.
We only recommend products that are relevant to the guide. Some links may be affiliate links.
Cleaning and Preparing Seeds
Cleaning harvested seed is a critical step in the seed saving process as it helps to remove debris, pulp and excess moisture that can affect seed viability and shelf life.
Prevent mould and rot – Seeds that are not properly cleaned may retain moisture or organic matter, creating an ideal environment for mould and rot to develop during storage. Not only can mould and rot render seeds unviable, it can also spread to other seeds in storage, resulting in the loss of the entire seed supply. By cleaning harvested seeds, gardeners remove potential sources of moisture and organic material that could encourage fungal growth, ensuring seeds remain healthy and viable for future planting.
Maintain seed viability – Debris and pulp left on seeds can create barriers to oxygen and moisture exchange, hindering the seed’s ability to respire and remain viable during storage. In addition, excess moisture trapped around seeds can lead to premature germination or seed rot, reducing their viability over time. Cleaning seeds ensures that they are free of any contaminants that could interfere with their ability to breathe and maintain their metabolic processes, thus preserving their viability for successful germination in future planting seasons.
Prevent cross-contamination – Seeds that are not properly cleaned may carry traces of pathogens, pests or other contaminants from the surrounding plant material. These contaminants can spread to other seeds in storage, affecting their quality and potentially causing disease outbreaks in future plantings. By thoroughly cleaning harvested seed, growers can minimise the risk of cross-contamination and ensure that their seed stock remains free of harmful agents, promoting healthy plant growth and productivity.
Easier storage and organisation – Clean seed is easier to store and organise than seed coated with debris or pulp. Removing extraneous material from seeds reduces the risk of clumping or sticking, allowing more efficient storage in containers or seed packets. In addition, clean seed is easier to label and identify, making it easier to properly organise and catalogue seed varieties for future use.
The following is a step-by-step guide to cleaning seeds using simple household materials and techniques.
Materials needed
- Harvested seeds
- Fine mesh sieve or strainer
- Glass bowl or container
- Some water
- Paper towels or clean cloth towels
Prepare the harvested seeds – Start by collecting the harvested seeds and removing any large debris or plant material by hand. Discard any seeds that appear damaged, discoloured or unhealthy.
Initial cleaning with water – Place the harvested seeds in a fine mesh sieve or colander. Hold the sieve under running water or immerse it in a bowl of water and gently swirl the seeds to remove any remaining debris, pulp or organic matter.
Inspect and remove any floating debris – After rinsing, carefully inspect the seeds for any floating debris, immature seeds or other contaminants that may have risen to the surface of the water. Use your fingers or a spoon to skim off and discard these unwanted materials.
Drain and dry the seeds – Once the seeds have been cleaned and any floating debris removed, carefully lift the strainer or sieve out of the water and allow the excess moisture to drain away. You can tap the strainer gently against the sink or worktop to facilitate drainage. Avoid shaking or agitating the seeds too vigorously to prevent damage.
Spread the seeds out to dry – Place the cleaned seeds on a paper towel or drying mat. Spread the seeds out in a single layer, making sure they do not touch each other. Allow the seeds to air dry completely, preferably in a well-ventilated area away from direct sunlight or heat sources. Use a mesh drying rack to improve airflow
Final inspection and storage – Once the seeds are thoroughly dry, carefully inspect them one last time to ensure they are clean, dry and free from any remaining debris or moisture. Remove any seeds that appear mouldy, discoloured or otherwise compromised. Place the clean, dry seeds in airtight containers or seed packets, label them with the variety and harvest date, and store in a cool, dry place until ready to plant.
Proper Storage Methods
Proper storage of seed is essential to maintain its viability over time and ensure successful germination in future planting seasons.
Choose appropriate containers
- Use airtight containers such as glass jars, plastic containers with tight-fitting lids or resealable plastic bags to store seeds.
- Ensure that containers are clean, dry and free from residual moisture or contaminants that could affect seed quality.
Optimum temperature and humidity conditions
- Store seeds in a cool, dry and dark environment to minimise exposure to temperature fluctuations and moisture.
- Ideally, the storage temperature should be between 32°F (0°C) and 50°F (10°C), as lower temperatures can prolong seed viability.
- Avoid storing seeds in areas prone to moisture, such as basements or bathrooms, as excess moisture can cause seeds to mould or deteriorate.
Use desiccant
- Place a packet of desiccant, such as silica gel or milk powder, in the seed storage container to absorb any residual moisture and maintain optimum humidity levels.
- Ensure that the desiccant is placed in a separate bag or compartment within the container to prevent direct contact with the seeds.
Labelling and organisation
- Clearly label each seed container with the plant variety, harvest date and any other relevant information, such as specific growing conditions or seed source.
- Use waterproof and fade-resistant labels or markers to ensure that labelling remains legible over time.
- Organise seeds by plant type, alphabetically or by planting season for easy retrieval and inventory management.
Store in a dark place
- Keep seed containers away from direct sunlight and fluorescent light sources, as exposure to light can reduce seed viability over time.
- Store seeds in a dark cupboard, pantry or closet to minimise light exposure and protect them from potential damage.
- A mini thermometer/hygrometer can help monitor conditions.
Regular monitoring and rotation
- Check stored seeds regularly for signs of moisture, mould or insect damage.
- Rotate seed supplies regularly, using older seeds first and replenishing with fresh seeds as needed to ensure a continuous supply of viable seeds for planting.
Maintain consistent conditions
- Avoid frequent temperature fluctuations or exposure to extreme temperatures as these can affect seed viability.
- If seeds are stored in a fridge or freezer, ensure that the temperature remains stable and does not fluctuate significantly.
Creating a seed saving system that allows the efficient storage and cataloguing of seeds from multiple plant varieties offers many benefits to gardeners.
Conservation of genetic diversity – By saving seeds from different plant varieties, gardeners help to maintain genetic diversity within their garden and the wider ecosystem. A diverse seed collection provides a reservoir of unique traits, flavours and characteristics that can enhance the resilience, adaptability and biodiversity of the garden.
Cost savings and sustainability – A well-organised seed saving system allows gardeners to reduce their dependence on commercial seed suppliers, thereby saving money and promoting sustainability. By harvesting and saving seeds from their own garden, gardeners can create a self-renewing resource that eliminates the need for frequent seed purchases and reduces their environmental footprint.
Customisation and adaptation to local conditions – By saving seeds from plants that have thrived in their specific growing conditions, gardeners can develop varieties that are uniquely adapted to their local climate, soil and ecosystem. Over time, this process of selection and adaptation results in plants that are more resilient, productive and suited to the gardener’s specific needs and preferences.
Empowerment and self-sufficiency – Developing a seed saving system empowers gardeners to take control of their food supply and become more self-sufficient in their gardening endeavours. By mastering the art of seed saving, gardeners gain a deeper understanding of the life cycle of plants, improve their gardening skills, and cultivate a sense of independence and resilience in the face of environmental challenges or disruptions.
Increased crop diversity and experimentation – A diverse seed collection opens up opportunities for experimentation and innovation in the garden. Gardeners can explore new plant varieties, test different growing techniques, and participate in breeding projects to develop unique hybrids or heirloom varieties tailored to their tastes and preferences. This experimentation fosters creativity, curiosity and a spirit of discovery in the garden.
Community building and sharing – A seed saving system can also serve as a platform for community building and sharing among gardeners. By exchanging seeds with other gardeners, participating in seed exchanges or seed libraries, and sharing knowledge and resources, gardeners can strengthen social ties, encourage collaboration, and foster a sense of camaraderie within the gardening community.
The creation of a seed saving system that facilitates the efficient storage and cataloguing of seeds of multiple plant varieties offers a wide range of benefits, including the preservation of genetic diversity, cost savings, adaptation to local conditions, empowerment, experimentation and community building.
Seed Viability and Testing
Assessing the viability of saved seeds through simple germination tests is a valuable skill that allows gardeners to determine which seeds are still viable for planting. The following is how to carry out a simple germination test.
Materials required
- Saved seeds
- Paper towels or coffee filters
- Plastic zip-lock bags or containers
- Bottled water
- Markers for labelling
Prepare the seeds – Select a sample of seeds from your stored collection that you wish to test for viability. Choose seeds that have been properly stored in a cool, dry place and are labelled with the plant variety and harvest date.
Moisten the paper towels – Take a paper towel or coffee filter and moisten it with water until it is damp, but not soaking wet. Place the damp paper towel on a flat surface, such as a plate or tray.
Arrange the seeds – Place a small number of seeds on the damp paper towel, spacing them evenly to allow room for germination. If you are testing several seed varieties, label each section of the paper towel with the appropriate plant variety.
Cover and seal – Carefully fold the damp paper towel over the seeds to cover them, making sure the seeds are in contact with the damp surface. Place the paper towel with the seeds in a plastic zip-lock bag or container to create a moist environment for germination. Seal the bag or container to keep the moisture in.
Label and date – Use a marker to label the plastic bag or container with the plant variety and date of testing. This will help you track the progress of germination and identify the seeds later.
Provide warmth and darkness – Place the sealed bag or container in a warm, dark place, such as on top of a refrigerator or in a kitchen cupboard. The ideal germination temperature varies depending on the plant species, but generally room temperature (around 70-75°F or 21-24°C) is suitable for most seeds.
Monitor germination – Check the seeds regularly over the next few days to monitor germination progress. Keep the paper towel moist by adding water as needed to maintain humidity. Germination times vary depending on the seed variety, so be patient and continue to monitor the seeds for signs of sprouting.
Record the results – After a period of time (usually 7-14 days), assess the germination rate by counting the number of seeds that have sprouted. Calculate the percentage of seeds that have germinated compared to the total number of seeds tested to determine the viability rate. A fine mist spray bottle helps maintain the perfect moisture level without overwatering.
Interpret the results – Based on the observed germination rate, you can assess the viability of the stored seeds. Seeds with a high germination rate (e.g. 70% or more) are considered viable and suitable for planting. Seed with a low germination rate may still be viable but may require special treatment or additional time to germinate. Seed that does not germinate after the test period may be non-viable and should be discarded or replaced.
Tips for Success
Some more tips and tricks for successful seed harvesting and storage.
Save seeds from open-pollinated or heirloom varieties
- Open-pollinated and heirloom varieties tend to produce seeds that are true to type, meaning they will reliably grow into plants with similar characteristics to the parent plant.
- Save seeds from open-pollinated or heirloom varieties to preserve genetic diversity, support sustainable gardening practices, and maintain unique characteristics and flavours in your garden.
Avoid cross-contamination
- To prevent cross-contamination between different seed varieties, take precautions when harvesting, processing and storing seeds.
- Clearly label each seed container with the plant variety and harvest date to avoid mix-ups.
- Clean and disinfect tools, hands and work surfaces between handling different seed varieties to minimise the risk of accidental cross-contamination.
Practice isolation when saving seed
- When saving seed from crops that are prone to cross-pollination, such as cucurbits (e.g., squash, cucumbers, melons), brassicas (e.g., broccoli, cabbage, kale), or corn, practice isolation techniques to maintain seed purity.
- Use physical barriers such as row covers, cages or spacing to prevent unwanted cross-pollination between varieties of the same species.
Rotate seed stock regularly
- Regularly rotate your seed stock by using older seeds first and replenishing with fresh seeds as needed.
- Conduct germination tests on stored seed every few years to assess viability and determine if any seed needs to be discarded or replaced.
- Replace seeds that show signs of deterioration, such as mould, discolouration or damage, with fresh seeds to maintain a healthy and viable seed collection.
Store seeds in multiple locations
- To minimise the risk of losing your entire seed collection due to unforeseen circumstances such as pests, mould or environmental disasters, consider storing seeds in multiple locations.
- Divide your seed collection into smaller batches and store them in different containers or locations, such as a basement, pantry or refrigerator, to spread the risk of loss.
Invest in long-term storage solutions
- For seeds intended for long-term storage, consider investing in specialised storage solutions designed to maintain seed viability for extended periods of time.
- Vacuum-sealed bags, moisture-proof containers or seed vaults equipped with desiccants and temperature controls can provide optimal conditions for long-term seed storage. A vacuum sealer system removes air and extends seed life significantly
In addition to ensuring the continuity of their indoor oasis, garage gardeners become custodians of biodiversity and stewards of sustainability by embracing the art of seed saving. Each carefully collected and saved seed is a promise of future growth, a testament to the interconnectedness of life, and a reminder of our role in caring for the earth. In the quiet embrace of our garages, let us continue to cultivate not just plants, but a deeper connection to the cycles of life, for in the humble seed lies the promise of a greener, more vibrant tomorrow.